How to Install an AIO Liquid CPU Cooler
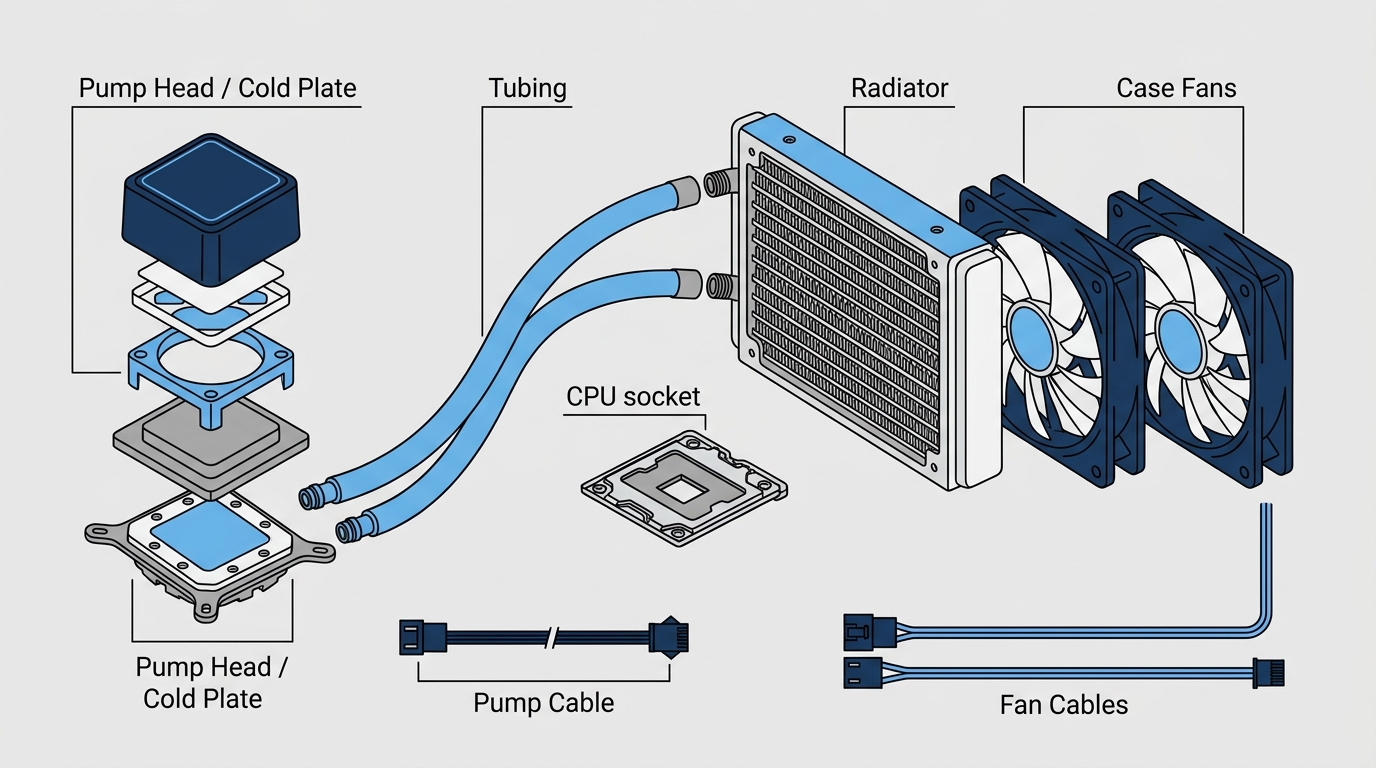
An AIO liquid CPU cooler is a self-contained cooling unit combining a pump, pre-filled tubing, and radiator that dissipates CPU heat without manual filling or custom loop assembly.
Last updated: September 2026
Table of Contents
- Quick Answer: How Do You Install a Liquid CPU Cooler?
- What You’ll Need Before You Start
- Tools and Materials Checklist
- Compatibility Check: Do This First
- Radiator Size and Placement: Plan This Before You Build
- Which Radiator Size Should You Use?
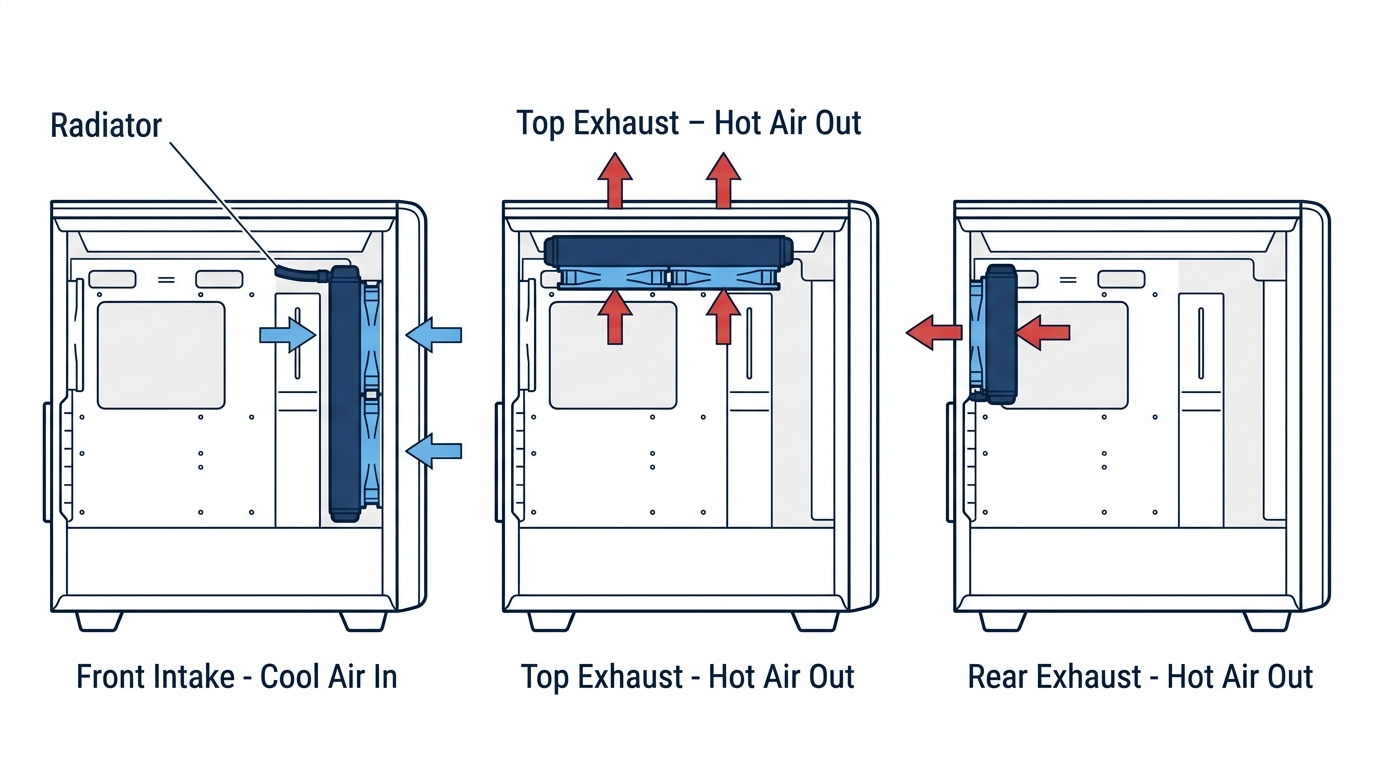
- Where to Mount the Radiator in Your Case
- Fan Direction: Intake or Exhaust?
- Step-by-Step: How to Install a Liquid CPU Cooler
- Step 1: Install the CPU First
- Step 2: Prepare and Install the Backplate
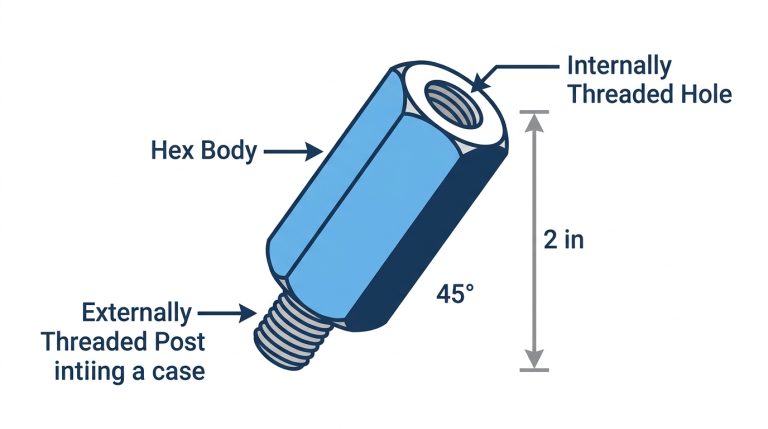
- Step 3: Attach the Standoffs or Mounting Posts
- Step 4: Apply Thermal Paste
- Step 5: Mount the Pump Head onto the CPU
- Step 6: Install Fans onto the Radiator
- Step 7: Mount the Radiator in the Case
- Post-Installation Checks: Don’t Skip These
- BIOS Verification
- Stress Test for Temperature Verification
- Common AIO Installation Mistakes (and How to Avoid Them)
- FAQ: AIO Cooler Installation Questions Answered
- Do liquid CPU coolers need to be filled?
- How do I set up a liquid CPU cooler for the first time?
- What is the correct way to install an AIO cooler pump head?
- How hard is it to install liquid cooling?
- Does radiator placement affect CPU temperatures?
- The Short Version
Quick Answer: How Do You Install a Liquid CPU Cooler?
Installing a liquid CPU cooler takes 20 to 30 minutes and eight steps: verify socket compatibility, install the backplate, attach standoffs or mounting brackets, apply thermal paste, mount the pump head onto the CPU using a criss-cross tightening pattern, attach fans to the radiator, mount the radiator in the case, then connect the pump cable to the CPU_FAN or AIO_PUMP header. That’s it. No special skills required.
Most people think AIO liquid cooling is complicated or reserved for advanced builders. It’s not. The process is actually more straightforward than troubleshooting a misbehaving air tower cooler that won’t clear tall RAM. That said, a few specific mistakes, wrong mounting bracket, pump connected to the wrong header, fans installed backward, will cause real problems. This guide covers both Intel and AMD sockets, walks through radiator placement before you commit, and includes post-installation checks that most guides skip entirely.
- 🟢 Safe: Pre-applied thermal paste, don’t touch, don’t add more
- 🟢 Safe: Hand-tight thumbscrews in criss-cross pattern
- 🟢 Safe: Pump cable to CPU_FAN or AIO_PUMP header
- 🟡 Caution: Check bracket label before attaching, wrong socket = loose cooler
- 🟡 Caution: Verify fan direction before final mounting
- 🔴 Danger: Pump connected to chassis fan header, CPU will overheat in minutes
- 🔴 Danger: Over-torquing thumbscrews, can bow the PCB
- 🔴 Danger: Sharp tube kinks, restricts coolant flow
What You’ll Need Before You Start
Tools and Materials Checklist
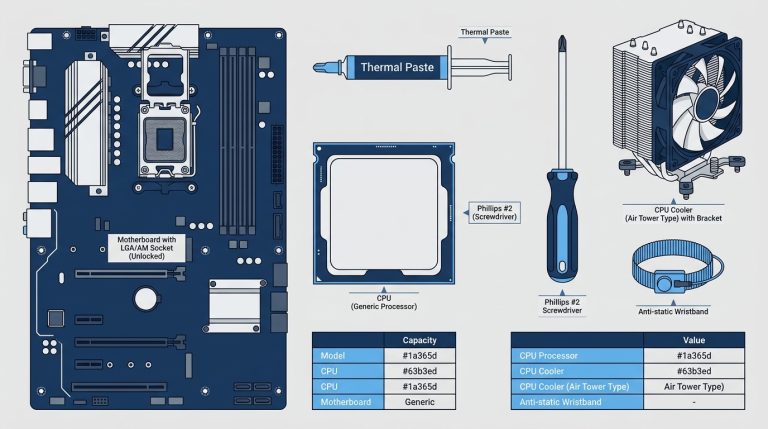
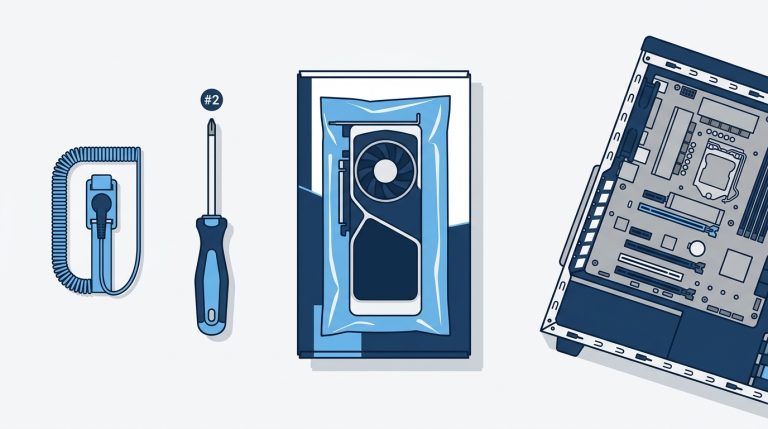
- Phillips #2 screwdriver: For backplate screws, fan screws, and radiator mounting
- Isopropyl alcohol (90%+) and lint-free cloth: To clean the CPU IHS if replacing an existing cooler
- Thermal paste: Most AIOs include pre-applied paste; keep a tube handy if yours doesn’t
- Your AIO’s hardware bag: Backplate, standoffs, brackets, thumbscrews, fan screws, count everything before you start
Compatibility Check: Do This First
This is where first-time builders go wrong. Installing the wrong bracket for your socket means the pump head won’t seat correctly, or won’t seat at all. Check your CPU socket before opening anything else. Your CPU box label, motherboard manual, or a free tool like CPU-Z will confirm it in seconds.
| Socket | Common CPUs | Mounting Type | Backplate Needed? |
|---|---|---|---|
| LGA 1700 | Intel 12th–14th Gen (Core i5/i7/i9) | Screws + standoffs | Yes, not pre-installed |
| LGA 1851 | Intel Core Ultra 200 (Arrow Lake) | Screws + standoffs | Yes, not pre-installed |
| LGA 1200 | Intel 10th–11th Gen | Screws + standoffs | Yes, not pre-installed |
| AM4 | Ryzen 1000–5000 series | Screws or clips | Usually pre-installed on motherboard |
| AM5 | Ryzen 7000, 8000G, 9000 series | Screws | No, stock backplate stays |
Once you know your socket, cross-reference it with your AIO’s supported socket list. That list is always in the manual and on the product page. Don’t assume, confirm. If you’re unsure how your AIO cooler’s internal components actually work before mounting it, this breakdown of how AIO liquid cooling works covers the pump, cold plate, and radiator loop in detail.
Radiator Size and Placement: Plan This Before You Build
Most installation guides start with screwdrivers. They skip the part where you figure out where the radiator goes, which is a decision that affects your CPU temps, your GPU temps, and whether everything physically fits. Make this call before touching any hardware.
Which Radiator Size Should You Use?
Bigger radiators dissipate more heat, but they’re not always better for your specific build. A 360mm radiator in a case with poor front-panel airflow will underperform a 240mm with clear intake. Match radiator size to your CPU’s TDP and your case’s clearance specs. For a detailed comparison with measured data, see our guide on AIO radiator sizes from 240mm to 360mm.
| Radiator Size | Fan Config | Avg CPU Temp Delta vs Stock Cooler* | Best For |
|---|---|---|---|
| 120mm | 1 × 120mm fan | –8 to –12°C | Budget builds, small cases |
| 240mm | 2 × 120mm fans | –15 to –22°C | Mid-range CPUs, most ATX cases |
| 280mm | 2 × 140mm fans | –18 to –25°C | High-TDP CPUs, mid-tower+ |
| 360mm | 3 × 120mm fans | –22 to –30°C | Enthusiast CPUs (Core i9, Ryzen 9) |
*Delta measured at full load (Cinebench R23 multicore) vs Intel stock cooler. Results vary by CPU TDP and ambient temperature.
Where to Mount the Radiator in Your Case
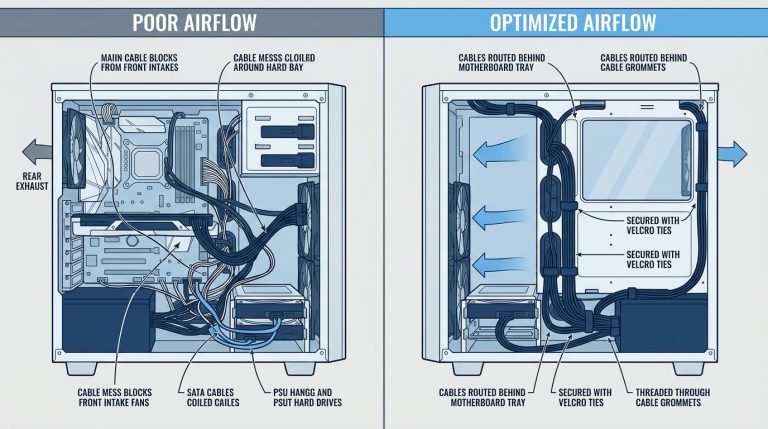
- Top mount (exhaust): Best all-around CPU thermals. Hot air exits the case directly without crossing other components first. Recommended default for most builds.
- Front mount (intake): Pulls cool ambient air in before it reaches the CPU. Can improve GPU temps by 1–3°C in some configs, but may add a degree or two to CPU temps depending on case design.
- Rear mount (exhaust): Works for 120mm and 140mm only. Lowest thermal priority but useful when top clearance is limited by RAM or a VRM heatsink.
Always check your case’s clearance specs. Some cases list top radiator support as “up to 360mm” but that assumes low-profile RAM. If your DDR5 sticks have tall heatspreaders, measure first.
Fan Direction: Intake or Exhaust?
The rule is simple: fans always push air toward the radiator fins and out through the vent panel. The label or sticker on a fan faces the direction air moves from, the sticker side is the intake side.
- Top mount: Fans face down, pushing air up through the radiator and out the top exhaust vents
- Front mount: Fans face into the case interior, pulling cool air in through the front panel and through the radiator
Get this backward and you’ll pump hot case air through the radiator instead of cooling it. Not great.
Step-by-Step: How to Install a Liquid CPU Cooler
Step 1: Install the CPU First
The CPU must be seated and locked down before the cooler goes anywhere near it. If you’re starting from scratch, get the processor installed and secured first. On Intel LGA sockets, the socket lever ejects the plastic CPU protector automatically, don’t remove it manually before seating the chip. For a full walkthrough, our step-by-step CPU installation guide covers every Intel and AMD socket in detail.
Step 2: Prepare and Install the Backplate
Intel (LGA 1700 / LGA 1851 / LGA 1200): Intel boards don’t ship with a pre-installed cooler backplate, so you’ll use the one in your AIO’s hardware bag. Lay the motherboard flat with the back facing up. Thread the backplate posts through the four holes surrounding the CPU socket from the rear. Attach any rubber or plastic insulators included, these prevent the metal backplate from touching PCB traces and causing shorts.
AMD AM4: Most AM4 motherboards ship with a stock backplate already attached. Check your AIO’s instructions, some require you to remove it and use their own; others mount directly to it. Cooler Master and CORSAIR AIOs frequently use the stock AM4 backplate unchanged.
AMD AM5: AMD’s AM5 socket ships with the backplate already screw-fixed to the motherboard, don’t remove it. Most modern AIOs include AM5-specific mounting brackets and standoffs that attach to that stock backplate rather than a replacement backplate. Follow your AIO’s manual precisely here, bracket designs vary between brands.
Step 3: Attach the Standoffs or Mounting Posts
For Intel builds: screw the threaded standoffs into the backplate posts from the front of the motherboard. Hand-tight only at this stage. For AMD builds: clip or screw the AIO’s bracket arms onto the backplate, again per your manual.
Before doing anything else, read the label on each bracket. Most AIOs include three to four different brackets for different sockets. Using the wrong one is the single most common installation mistake. The pump head will either sit too loose, too tight, or misaligned. Worth the 10 seconds it takes to double-check.
Step 4: Apply Thermal Paste
Check the cold plate on the bottom of the pump head first. If you see a gray or silver material on the copper surface, thermal paste is pre-applied. Don’t touch it. Don’t add more. Remove any protective film right before mounting.
If your AIO doesn’t include pre-applied paste, place a pea-sized dot, roughly 3 to 4mm in diameter, centered on the CPU’s integrated heat spreader (IHS). The pressure from mounting spreads it evenly. Don’t spread it by hand; that introduces air pockets. Too much paste causes it to squeeze onto the socket. Too little creates hot spots. For more detail on application technique, see our guide on how to apply thermal paste correctly.
Step 5: Mount the Pump Head onto the CPU
Confirm the correct mounting bracket is attached to the pump head. Lower it straight down onto the CPU, don’t slide or drag it across the IHS. Align the bracket holes with the standoffs.
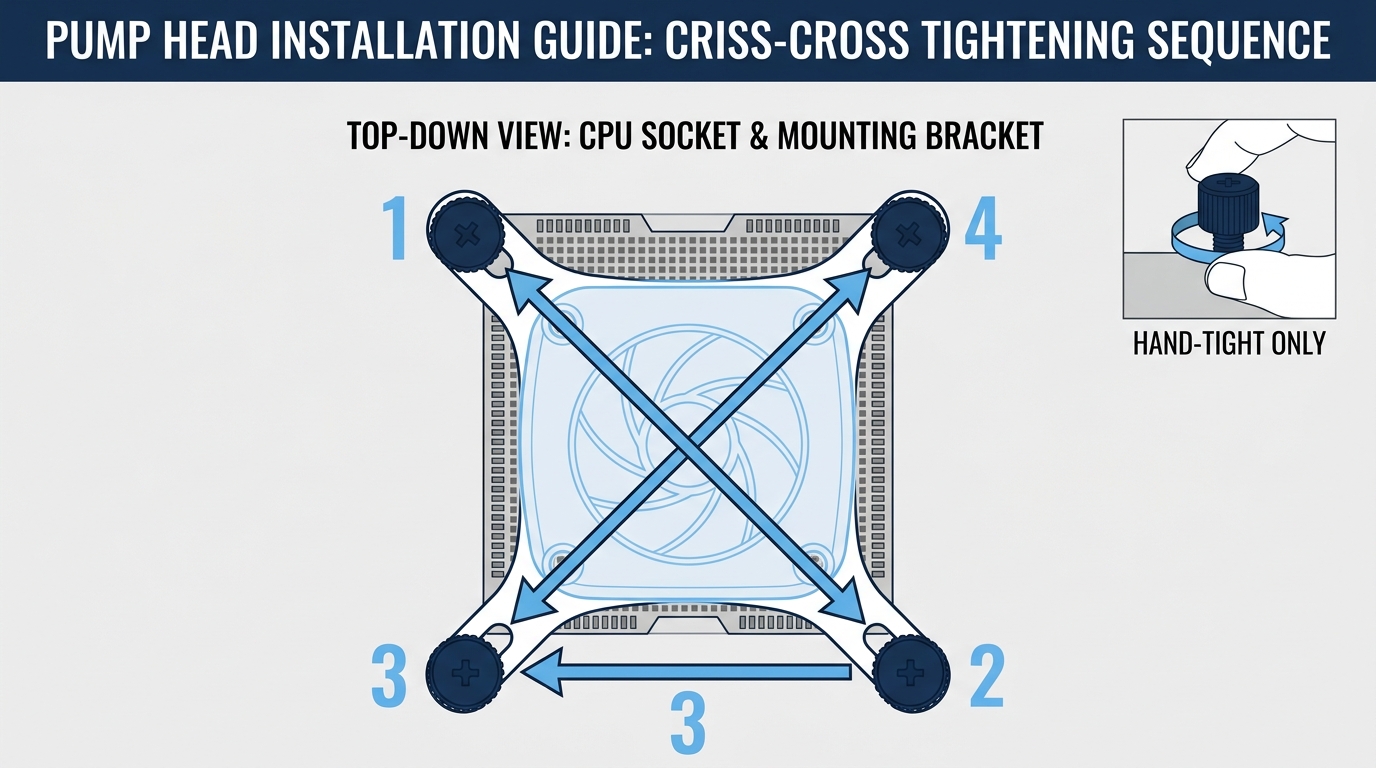
Thread the thumbscrews by hand in a diagonal criss-cross pattern, like tightening lug nuts on a wheel. Never tighten one corner fully before touching the others. The sequence is: top-left, bottom-right, top-right, bottom-left (or equivalent diagonal pairs for your bracket layout). This ensures even pressure across the IHS, which is what gives you consistent thermal contact.
Stop when you feel firm resistance. You should not need a screwdriver for thumbscrews. Over-torquing can bow the PCB or crack the substrate around the socket. Snug and even beats tight every time.
Step 6: Install Fans onto the Radiator
Attach the radiator fans using the included screws (use the ones from the AIO box: they’re cut for your fan thickness plus the radiator’s thread depth, and a screw that’s too long can puncture a radiator channel). Before you drive a single screw, confirm fan orientation. The label or sticker on each fan should face the direction air moves from, toward the radiator fin stack, not away from it. Tighten screws in an alternating pattern so the fan frame seats evenly against the radiator.
Step 7: Mount the Radiator in the Case
Slide the radiator assembly into your chosen mount position. Secure it with the case-provided screws or the AIO-included screws, don’t mix them unless the thread pitch matches. Check that tubes route without sharp kinks. The minimum bend radius on most AIO tubing is around 50mm. A kinked tube restricts coolant flow and raises temperatures noticeably, even if the pump is running full speed.
| Cable | Connects To | Purpose |
|---|---|---|
| Pump cable (3-pin or 4-pin) | CPU_FAN or AIO_PUMP header | Powers and monitors the pump |
| Radiator fan cables | CHA_FAN headers or fan hub | Powers and controls radiator fans |
| USB 2.0 header (if applicable) | USB 2.0 header on motherboard | RGB and software control (iCUE, NZXT CAM, etc.) |
| ARGB/RGB cable (if applicable) | ARGB or RGB header on motherboard | Pump head or radiator lighting |
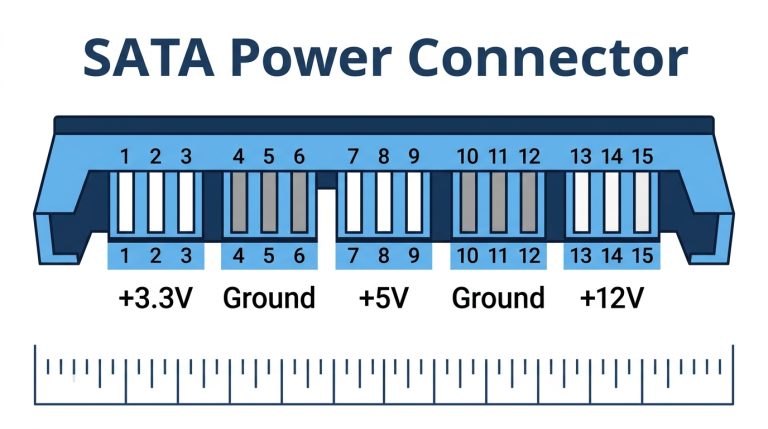
| SATA power (some models) | PSU SATA cable | Powers an integrated hub or controller |
The pump connection is the one that matters most. If the pump runs at chassis fan speeds (which can be throttled to 30 to 40% RPM), it won’t circulate coolant fast enough, and your CPU will hit its thermal limit within minutes under load. Set the AIO_PUMP header to “Full Speed” or “AIO Pump” mode in BIOS. For a full breakdown of header types and their functions, the guide on motherboard fan headers covers CPU_FAN, AIO_PUMP, CHA_FAN, and the differences between them.
Post-Installation Checks: Don’t Skip These
BIOS Verification
Boot into BIOS before loading Windows. Check two things:
- CPU Fan RPM: A running AIO pump should show 1,800 to 3,000 RPM at idle. Zero RPM means a bad connection or wrong header.
- CPU temp at idle: Should read within 5 to 10°C of ambient room temperature. In a 22°C room, expect 27 to 32°C idle.
If the fan shows 0 RPM, power down immediately and recheck your connections before running any load.
Stress Test for Temperature Verification
Run a 10-minute stress test using Cinebench R23 multicore or Prime95 small FFT. Watch your temperatures with HWiNFO64 or HWMonitor. Leaks on AIOs are extremely rare, but it’s smart to watch the pump fittings during the first boot.
| CPU Class | Expected Max Temp (240mm AIO, full load) |
|---|---|
| 65W TDP (Ryzen 5, Core i5) | 65–78°C |
| 105W TDP (Ryzen 7, Core i7) | 72–85°C |
| 125W+ TDP (Ryzen 9, Core i9, Core Ultra 9 285K) | 80–92°C |
If you’re hitting 95°C or above on any CPU class, reseat the cooler, reapply thermal paste, and verify the pump header assignment. Consistently high temps mean something went wrong in steps 4 or 5.
- 28°C = 82°F (typical idle in a 22°C room)
- 38°C = 100°F (warm idle, high ambient)
- 65°C = 149°F (low-load target, 65W CPU)
- 75°C = 167°F (normal full-load, mid-range CPU)
- 85°C = 185°F (acceptable for 105W+ CPUs under sustained load)
- 92°C = 198°F (upper safe limit for most modern CPUs)
- 95°C = 203°F (thermal throttle territory, investigate immediately)
- 100°C = 212°F (TjMax on most modern Intel CPUs; AMD Ryzen TjMax is typically 95°C, performance will degrade)
Formula: °F = (°C × 1.8) + 32.
Common AIO Installation Mistakes (and How to Avoid Them)
Seven specific errors account for the vast majority of failed AIO installs. All of them are preventable.
- Wrong bracket for your socket: The system boots but the cooler rocks on the CPU or won’t tighten evenly. Always read the socket label printed on the bracket before attaching it to the pump head.
- Pump connected to a chassis fan header: The BIOS may set a CHA_FAN header to 30 to 50% speed. The pump throttles down, coolant barely moves, and the CPU hits its thermal limit within minutes at full load. Use CPU_FAN or AIO_PUMP only.
- Over-torquing thumbscrews: Excessive force bows the PCB and can crack solder joints around the socket. Hand-tight is the correct final state. No tools needed.
- Fans mounted backward: Air pushes in the wrong direction, hot case air gets cycled through the radiator instead of cool ambient air. Always verify airflow direction before final mounting.
- Sharp tube kink: Restricts coolant flow. Temperatures will be 5 to 15°C higher than expected even with the pump running correctly. Plan your tube routing before securing the radiator.
- Forgetting to remove the thermal paste protective film: Some AIOs ship with a clear film over the pre-applied paste. Leaving it on creates an insulating layer between the cold plate and CPU. The result is CPU temps that spike immediately. Classic mistake.
- Not checking pump head height clearance: Taller pump heads can reach 55 to 65mm and may physically contact tall RAM heatspreaders or VRM heatsinks on compact motherboards. Measure before you commit to a mounting orientation.
FAQ: AIO Cooler Installation Questions Answered
Do liquid CPU coolers need to be filled?
No. Every AIO cooler comes pre-filled and factory-sealed. You never add coolant, open any fittings, or bleed the loop. That’s the entire point of “all-in-one”, it’s a closed system. Custom loop cooling does require manual filling, but that’s a fundamentally different product category with a much steeper setup process. If your AIO is pre-filled and sealed, just install it and go.
How do I set up a liquid CPU cooler for the first time?
Follow the eight-step sequence: verify socket compatibility and select the correct bracket, install the backplate, attach standoffs or bracket arms, apply (or check pre-applied) thermal paste, lower the pump head onto the CPU and tighten in a criss-cross pattern, attach fans to the radiator, mount the radiator in the case, then connect the pump to CPU_FAN or AIO_PUMP and the fans to CHA_FAN or a hub. Total time is 20 to 30 minutes for a first-time builder.
What is the correct way to install an AIO cooler pump head?
Lower the pump head straight down onto the CPU without sliding it across the IHS. Align the bracket holes with the standoffs, then thread thumbscrews in diagonal pairs, top-left and bottom-right first, then top-right and bottom-left. Tighten gradually and evenly until you feel firm resistance. Hand-tight only. Using a screwdriver or applying more torque than your fingers provide can damage the motherboard PCB.
How hard is it to install liquid cooling?
AIO installation sits at roughly 2 out of 5 on the difficulty scale. If you can seat a CPU and plug in a fan cable, you can install an AIO. The process is more physically straightforward than routing custom cable management or aligning a large air tower cooler. Custom loop water cooling is a different situation entirely, 4 to 5 out of 5, involving reservoir filling, leak testing, and custom tubing runs. This guide covers AIO only.
Does radiator placement affect CPU temperatures?
Yes, measurably. Top-exhaust mounting generally produces the best CPU temperatures because hot air exits the case without recirculating across other components. Front-intake placement pulls in cooler ambient air, which can slightly reduce CPU temps in some cases and modestly help GPU temps by 1 to 3°C, but the results depend heavily on your specific case’s airflow design. Rear mounting is the weakest option and is only viable for 120mm and 140mm radiators.
The Short Version
Install the CPU first, fit the correct backplate for your socket, attach standoffs or bracket arms, apply a pea-sized dot of thermal paste if it’s not pre-applied, lower the pump head straight down, and tighten the thumbscrews in a diagonal criss-cross pattern until snug. Mount fans in the correct airflow direction, secure the radiator, then connect the pump to CPU_FAN or AIO_PUMP, not a chassis header. Boot into BIOS, confirm the pump is spinning at 1,800 RPM or above, then run a 10-minute stress test before closing up the case. Once you’ve got cooling sorted, the next logical steps are installing your GPU and running your first full system POST. Get the cooling right first and everything that follows goes smoother.

Alex has been building and tweaking custom PCs for over 12 years. From budget builds to full custom water loops, he’s assembled more than 50 systems and helped hundreds of builders troubleshoot their rigs. When he’s not benchmarking the latest hardware, you’ll find him optimizing airflow setups or stress-testing overclocks.