PC Won’t Turn On After a Power Outage: Fixes
A PC that won’t turn on after a power outage has typically experienced residual dirty power in its capacitors, a tripped surge protector, BIOS/CMOS corruption, or physical hardware damage from a voltage spike.
Last updated: October 2026
Table of Contents
- Quick Answer: Why Won’t My PC Turn On After a Power Outage?
- Why a Power Outage Can Stop Your PC From Turning On
- Before You Start: Quick Safety Checklist
- Step-by-Step Fixes (Start Here, Ordered by Likelihood)
- Fix 1: Drain Residual Power (The “Dirty Power” Reset)
- Fix 2: Check and Reset Your Surge Protector or Power Strip
- Fix 3: Inspect Power Supply Connections
- Fix 4: Clear the CMOS and Reset BIOS Settings
- Fix 5: Test the Power Supply Unit
- Fix 6: Run the Maker’s PSU Self-Test Instead of Opening the PSU
- Fix 7: Disconnect Non-Essential Hardware and Test a Minimal Boot
- Reading the Signs: What Your PC Is Telling You
- If Your PC Turns On But Windows Won’t Boot
- Run Windows Automatic Repair
- Run CHKDSK on the Boot Drive
- Rebuild the BCD (Boot Configuration Data)
- How to Assess Hardware Damage After a Power Surge
- How to Protect Your PC From Future Power Outages
- Surge Protectors: What the Specs Actually Mean
- UPS Units: The Better Solution
- Frequently Asked Questions
- Can a power outage permanently damage a PC?
- My PC turns on but there’s no display after the power outage. What’s wrong?
- How do I know if my PSU is dead or if it’s the motherboard?
- My PC won’t turn on but the power light is on. What does that mean?
- Should I keep trying to turn my PC on after a power outage?
- The Short Version
Quick Answer: Why Won’t My PC Turn On After a Power Outage?
Most of the time, a PC that won’t start after an outage has a power problem, not dead hardware. Start by unplugging the PC and holding the power button for 10-15 seconds to drain residual voltage from the capacitors. Then check your surge protector for a tripped reset button. If neither works, test the PSU and clear your CMOS. Only after those steps should you suspect physical hardware damage.
Most people assume a dead PC after an outage means fried components. That’s wrong most of the time. The bigger issue is that people confuse a power outage (loss of power) with a power surge (a voltage spike). Outages are mostly harmless. Surges, which often happen at the moment power is restored, are what actually kill hardware. Whether your PC turned off and won’t turn back on, or your system went dark all of a sudden with no warning, this guide walks you through a step-by-step diagnostic from the simplest 60-second fix to hardware-level assessment.
- 🟢 Dirty power in capacitors: Extremely common. 60-second fix. Start here.
- 🟢 Tripped surge protector: Common. Press the reset button on the strip.
- 🟡 CMOS/BIOS corruption: Moderately common. Requires opening the case.
- 🟡 Loose PSU connectors: Less common. Visual inspection needed.
- 🔴 Dead PSU: Happens after a direct surge hit. Requires replacement.
- 🔴 Motherboard or GPU damage: Rare but possible. Visible burn marks or scorch smell.

Why a Power Outage Can Stop Your PC From Turning On
There are two separate failure modes here, and they’re not the same thing.
The first is sudden power loss. When your power cuts out mid-operation, the capacitors inside your PSU and motherboard don’t discharge cleanly. This leaves residual “dirty” voltage trapped in the system. When you try to power back on, the board detects an abnormal state and refuses to start. No damage. Just stuck. A 60-second drain procedure clears it completely.
The second is a power surge. This is a brief spike in voltage that often accompanies power restoration, not the cutout itself. The surge hits when utility power returns and can spike well above the 120V nominal US standard. A quality PSU absorbs this hit. A cheap PSU or an unprotected system passes it downstream to the motherboard, GPU, and storage drives.
| Event | What Happens | Risk to PC | Common Result |
|---|---|---|---|
| Clean Power Outage | Sudden loss of power | Low | Dirty power / CMOS reset needed |
| Power Surge | Voltage spike (often at restoration) | High | PSU, motherboard, or drive damage |
| Brownout | Partial voltage drop | Medium | Unstable operation, possible PSU stress |
The PSU takes the hit first. Then the motherboard. Then storage. This is why a PC that turned off and won’t turn back on may only need a 60-second fix, or may need a new power supply entirely.
Before You Start: Quick Safety Checklist
Don’t skip this.
- Turn off the PC and unplug it from the wall before touching anything inside the case.
- Test the wall outlet with a phone charger or lamp. The outlet itself may be dead.
- Check your home’s breaker box. Power outages can trip breakers on specific circuits.
- If there’s a burning smell or visible scorch marks anywhere on the PC, do not attempt to power it on. Go straight to the hardware damage section.
- Don’t repeatedly press the power button. If a component is damaged, repeated power attempts make it worse. Not better.
Step-by-Step Fixes (Start Here, Ordered by Likelihood)
Work through these in order. Each step takes a few minutes.
Fix 1: Drain Residual Power (The “Dirty Power” Reset)
Start here. It’s free, it takes a minute, and when nothing is physically damaged it’s often all you need.
- Shut down and unplug the power cable from the rear of the PC (or from the wall).
- Hold the power button down for 10-15 seconds. This forces the capacitors to discharge.
- Wait a full 60 seconds before reconnecting anything.
- Plug back in and attempt a normal boot.
Why it works: the PSU and motherboard both hold residual charge in their capacitors after power is cut. Holding the power button drains that charge and resets the board to a clean state. No tools required.
Fix 2: Check and Reset Your Surge Protector or Power Strip
Most surge protectors have a resettable circuit breaker button, usually red or black, somewhere on the unit. Press it. If the “Protected” indicator light on the strip is off or not lit, the protection fuse has blown. The strip may still pass power, but the protection is gone. Replace it regardless.
Test the simplest thing first: unplug the PC from the surge protector entirely and plug it directly into a wall outlet you’ve confirmed is live. If the PC boots, the strip was the problem. Worth the extra 30 seconds to rule out.
UPS units have similar reset procedures. Check the display or indicator lights on the front of the unit and hold the power button if it has one.
Fix 3: Inspect Power Supply Connections
Open the case and physically check every PSU connector. A power surge can cause connectors to partially unseat, and voltage spikes can burn the contact points inside the connector housing.
- 24-pin ATX connector: The main motherboard power connection. Press the tab and reseat it firmly. You should hear a click.
- 4-pin or 8-pin CPU power: Located near the top-left of the motherboard. Frequently overlooked.
- PCIe power cables to GPU: Check both connectors if your card requires two.
Look for discoloration on any connector pins. Black residue or melted plastic means that connector or the component it feeds is dead. If you see that, learn more about what each cable does in our guide to PSU cables including the 24-pin, EPS, PCIe, and SATA connections before proceeding.
Fix 4: Clear the CMOS and Reset BIOS Settings
Power outages can corrupt BIOS/CMOS data, which prevents POST from completing. The PC appears dead, but the hardware is fine. Three ways to clear it:
- Method 1 (Jumper): With the power cord unplugged, short the two clear CMOS pins (labelled CLRTC, CLR_CMOS, JBAT1 or CLRCMOS1, depending on the brand) for 5 to 10 seconds with a screwdriver tip or a jumper cap, then remove it. Only older boards use a 3-pin jumper that you move from pins 1-2 to 2-3 and back.
- Method 2 (Battery): With the power cord unplugged, remove the coin cell battery. On its own this can take a while to work, so short the clear CMOS pins while the battery is out, then put it back.
- Method 3 (Rear I/O Button): If your board has a Clear CMOS button (often on the rear I/O panel), unplug the power cord first, press the power button once to drain leftover power, then hold the Clear CMOS button for 5 to 10 seconds.
After clearing CMOS, the BIOS resets to default settings. If you had XMP or EXPO enabled for your RAM, you’ll need to re-enable that profile after booting. This fix is specifically useful for the “PC turns on but no display after power outage” scenario, where the board is alive but can’t complete POST due to corrupted settings.
Fix 5: Test the Power Supply Unit
The PSU is the most commonly damaged component after a power surge. It’s designed to act as the first line of protection, absorbing the spike before it reaches the motherboard. Sometimes it does its job and dies doing it.
Paper clip test (basic, no tools):
- Disconnect the PSU from all components inside the PC.
- Bend a paper clip into a U shape and insert both ends into the green wire (PS_ON, pin 16) and any adjacent black wire (ground) on the 24-pin connector.
- Plug the PSU into the wall. If the PSU fan spins up, the unit has basic functionality. No spin means the PSU is likely dead.
Multimeter test (accurate): Per the ATX Desktop Form Factor specification, acceptable voltage tolerances are within ±5% of nominal values:
- 12V rail: Should read 11.4V-12.6V
- 5V rail: Should read 4.75V-5.25V
- 3.3V rail: Should read 3.135V-3.465V
Significant deviation from any of these means PSU failure. Replace the PSU before reconnecting it to the motherboard to avoid cascading damage to downstream components. You can also check the warning signs of a failing power supply to understand what other symptoms to look for beyond a post-outage no-boot.
Fix 6: Run the Maker’s PSU Self-Test Instead of Opening the PSU
It’s tempting to open the power supply and hunt for a blown fuse. Don’t. The Corsair PSU manual warns that “High voltages are present in the power supply” and says: “Do not open the power supply case or attempt to repair the power supply; there are no user-serviceable components.” Ignoring that also voids the warranty, per the same manual.
On a prebuilt, use the maker’s own test instead. Dell has a power supply self-test for its desktops: on models with a BIST button on the PSU, you turn the PC off, press the button and watch the LED. Not every Dell has that button, and the same page covers how to test the ones that don’t. If it still fails after one retest, Dell says to contact support for repair options. For other brands, check the support page for your exact model. If the PSU fails, replace it or have it repaired. Don’t go after the fuse yourself.
Fix 7: Disconnect Non-Essential Hardware and Test a Minimal Boot
A surge may have damaged one component that is now preventing the entire system from POSTing. Strip down to the minimum required for boot:
- One stick of RAM in slot A2
- Onboard graphics only (remove the GPU entirely)
- No USB devices connected
- No additional storage drives beyond the boot drive
If the PC boots with this minimal config, start adding components back one at a time. Whichever component causes the failure when added back is your damaged part. The GPU is a frequent casualty of power surges due to its direct PCIe connection and high power draw.
Reading the Signs: What Your PC Is Telling You
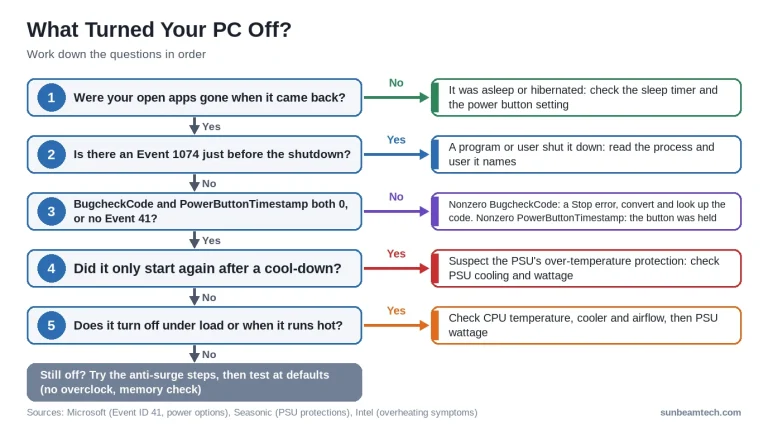
Not all post-outage symptoms are the same. Each pattern points to a different cause.
| Symptom | Most Likely Cause | Start With |
|---|---|---|
| No power at all (no lights, no fan movement) | Dead PSU or tripped surge protector | Fix 1, Fix 2, Fix 5 |
| Power light on, no display | CMOS corruption or GPU damage | Fix 4, then minimal boot |
| Fans spin briefly then shut off | PSU undervoltage or short circuit on board | Fix 5, Fix 7 |
| Boot loop (restarts repeatedly) | Corrupted Windows boot files | BIOS recovery or Fix 4 |
| Beep codes on POST | Specific hardware failure | Decode beep code below |
| Powers on, boots to BIOS only | Boot drive not detected or corrupted | Check BIOS boot order, test drive |
Beep code quick reference: If your system beeps during POST, the pattern points at what failed. The catch: the same number of beeps can mean different things depending on the BIOS generation and the board maker, so the beep table in your motherboard manual is the one to trust. AMI’s own tables show why:
- AMIBIOS8, 1 or 3 beeps: memory error. AMI’s fix is to reseat the RAM or swap in known-good modules.
- AMIBIOS8, 8 beeps: display memory error, so check the graphics card.
- Aptio 4, 1 beep early in POST: memory not installed.
- Aptio 4, 5 beeps: no console output or input devices found.
Modern boards often replace beep codes with LED POST indicators. ASUS and MSI boards use Q-Code displays or EZ Debug LEDs that light up a specific label (CPU, DRAM, VGA, BOOT) to identify which component failed to initialize. Our full breakdown of EZ Debug LEDs and what each one means covers how to read these codes on MSI boards specifically.

If Your PC Turns On But Windows Won’t Boot
Hardware is fine. Windows isn’t. A sudden power loss mid-write can corrupt the boot partition or file system on your drive. That’s the usual story behind a boot loop after a power outage, or Windows 11 refusing to load at all.
Run Windows Automatic Repair
If Windows fails to start correctly multiple times, it drops into the Windows Recovery Environment on its own. If it doesn’t, boot from a Windows 11 installation USB, pick your language, select Repair my PC, then go to Troubleshoot > Advanced options > Startup Repair. Let it run completely before trying anything else.
Run CHKDSK on the Boot Drive
From Windows Recovery, open Command Prompt and run:
chkdsk C: /f /r /x
This scans for file system errors caused by interrupted writes during the outage. An SSD that was actively writing when power cut can have corrupted sectors. CHKDSK flags and repairs them. It takes time. Let it finish.
Rebuild the BCD (Boot Configuration Data)
If Startup Repair doesn’t fix the boot loop, the Boot Configuration Data may be damaged. From Command Prompt in the Recovery Environment, run these three commands in order:
bootrec /fixmbr
bootrec /fixboot
bootrec /rebuildbcd
The rebuildbcd command scans for Windows installations and rewrites the BCD from scratch. After this, attempt a normal boot before trying any reinstall.
How to Assess Hardware Damage After a Power Surge
If the soft fixes above don’t work, do a physical inspection before concluding anything is dead. Your eyes and nose are diagnostic tools here.
- PSU: Look through the rear fan grille for scorch marks. Smell near the PSU exhaust vent. A sharp chemical or burning plastic smell confirms surge damage.
- Motherboard: Look for bulging or leaking capacitor tops (they should be flat, not domed). Check the VRM area near the CPU socket for burn marks or discoloration.
- GPU: Inspect the PCIe connector fingers on the bottom edge of the card for melting or carbon scoring.
- Storage drives: SSDs and HDDs can fail silently. No visible damage doesn’t mean they’re fine. Test with a USB enclosure connected to another system to confirm they’re readable.
If the motherboard shows visible burn damage, don’t attempt to power on. Period. The risk isn’t just another dead component. It’s a fire risk. Burnt capacitors can rupture.
On the cost side: if both your PSU and motherboard are dead, the repair cost may approach or exceed what a comparable replacement platform costs. Factor in the age of your components before spending money on repairs.
How to Protect Your PC From Future Power Outages
Surge Protectors: What the Specs Actually Mean
Not all surge protectors are equal. A power bar with a switch is not a surge protector. Look for these specs before buying:
- Joule rating: Minimum 1,000J for a gaming PC. 2,000J or higher for high-end systems. Higher joule ratings mean the protector can absorb more energy before its protection degrades.
- Clamping voltage: Should be 400V or lower. Lower numbers mean the surge is stopped sooner before it reaches your gear.
- UL 1449 listing: Required for legitimate surge protection certification in the US. Per the UL 1449 standard overview, this is the baseline test requirement for any device marketed as a surge protector.
Critical point: surge protectors wear out. After absorbing a significant surge, the metal oxide varistors (MOVs) inside degrade. The unit may still pass power but offer zero protection. If your surge protector just took a direct hit from an outage, replace it.
UPS Units: The Better Solution
A UPS (Uninterruptible Power Supply) provides both surge protection and battery backup. During an outage, your PC keeps running long enough for a clean shutdown. That eliminates the dirty power problem and the file system corruption problem at the same time.
Sizing a UPS for a gaming PC:
- Read the watt rating, not just the VA: A UPS has two ratings, and APC’s own sizing FAQ says neither the watt nor the VA rating may be exceeded.
- Example: APC’s Back-UPS 750VA (BX750MI) is rated 410 W. A PC that really draws 500W would overload it, even though 750 looks bigger than 500.
- Leave headroom: Pick a unit whose watt rating sits clearly above your PC’s actual draw under load, plus your monitor if it’s on the battery outlets. APC notes that oversizing also buys you extra backup time.
Brands like APC and CyberPower publish detailed runtime charts. The APC UPS Selector tool lets you input your system wattage and get matching unit recommendations. A good UPS costs $80-$150. That’s cheap insurance compared to a $400 motherboard or GPU replacement.
Frequently Asked Questions
Can a power outage permanently damage a PC?
A clean power outage with no accompanying surge rarely causes permanent damage. The destructive event is the voltage spike that often occurs when utility power is restored, not the cutout itself. Permanent damage is most likely when the PC had no surge protector, the PSU was already aged, or the surge was severe enough to overwhelm the PSU’s protection circuits.
My PC turns on but there’s no display after the power outage. What’s wrong?
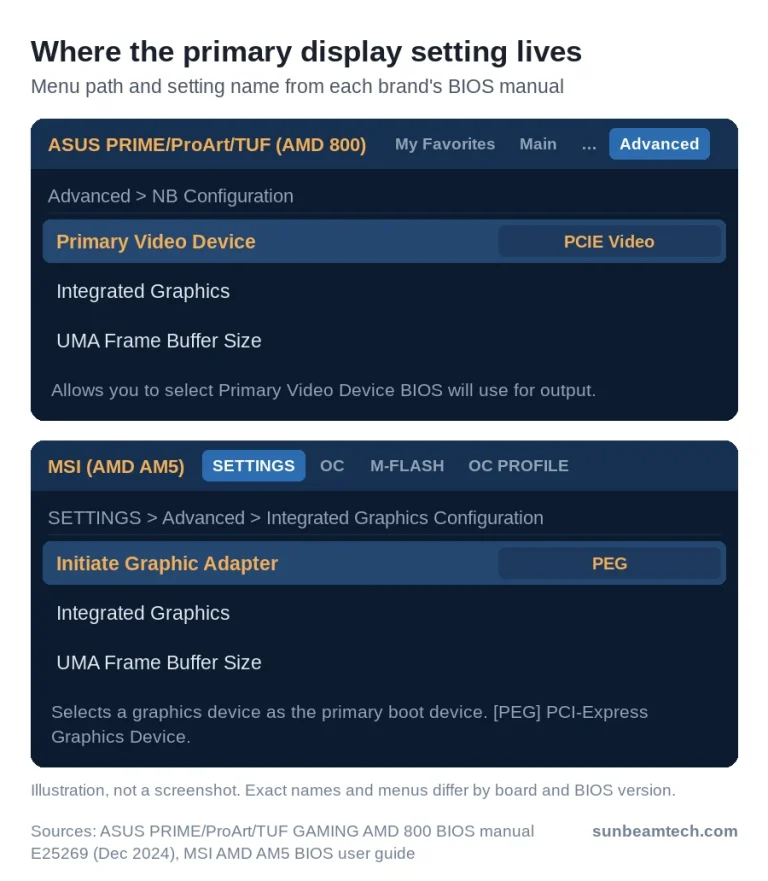
The three most common causes are CMOS corruption (clear it using Fix 4), GPU damage from a surge (remove the GPU and test with the CPU’s integrated graphics if available), and a monitor input source that reset to a different input. Work through those in that order. CMOS corruption is by far the most likely cause when the PC appears to power on normally but produces no image.
How do I know if my PSU is dead or if it’s the motherboard?
Run the paper clip test from Fix 5. If the PSU fan spins when shorted, the PSU has basic functionality on its 12V rail. If the PSU passes that test but the PC still won’t POST, try a known-good replacement PSU. If it boots with the replacement, the original PSU failed. If it still won’t boot with a confirmed-good PSU, the motherboard is the likely casualty. Check the EZ Debug LEDs on your board if it has them for more specific failure identification.
My PC won’t turn on but the power light is on. What does that mean?
A lit power light means the 5VSB (standby) rail from the PSU is reaching the motherboard. Standby power is separate from the main 12V rail that actually powers the system. So the PSU isn’t completely dead, but the 12V rail may have failed, or the motherboard isn’t sending the power-on signal back to the PSU. Start with Fix 1 (the dirty power drain). If the light stays on but the system won’t boot after that, move to Fix 5 and test the PSU’s main voltage rails with a multimeter.
Should I keep trying to turn my PC on after a power outage?
No. Try the dirty power drain from Fix 1 once. If there’s no response, stop pressing the power button and begin the diagnostic steps above. If a component is damaged, repeated power-on attempts push current through already-compromised circuitry and can worsen the damage or cause additional components to fail.
The Short Version
Work soft fixes first: drain the dirty power (Fix 1), check the surge protector (Fix 2), and clear the CMOS (Fix 4). If the system still won’t boot, test the PSU with a paper clip or multimeter before assuming anything else is dead. Physical inspection comes last: look for scorch marks, smell for burning, and check each component individually. And once you’re back up, a $80-150 UPS is the single best thing you can do to make sure you never deal with this again.

Alex has been building and tweaking custom PCs for over 12 years. From budget builds to full custom water loops, he’s assembled more than 50 systems and helped hundreds of builders troubleshoot their rigs. When he’s not benchmarking the latest hardware, you’ll find him optimizing airflow setups or stress-testing overclocks.