Fan Hub vs Fan Splitter: How to Run More PC Fans Safely
A fan splitter shares one motherboard fan header between several fans, while a fan hub powers them from your PSU and only takes the speed signal from the header.
Last updated: September 2026
Table of Contents
- Fan Hub vs. Fan Splitter: The Difference
- Fan Header Basics: 3-Pin vs. 4-Pin
- 3-pin headers (DC control)
- 4-pin headers (PWM control)
- Mixing 3-pin and 4-pin
- The Amperage Rule: How Many Fans Can One Header Handle?
- Typical fan current draw
- The safe math
- How to find your header’s rating
- How a Fan Splitter Works
- All fans get the same speed signal
- Only one fan reports its RPM
- Does splitting reduce fan speed?
- Group fans that should behave the same
- How a Fan Hub Works
- How many fans can SATA power handle?
- Types of Fan Hubs
- Basic PWM hub
- ARGB PWM hub
- 12V RGB hub
- Smart hubs and controllers
- Built-in case hubs
- What to Check Before Buying
- Splitter or Hub: Which Do You Need?
- How to Install a Fan Splitter
- How to Install a Fan Hub
- Common Problems and Fixes
- Fans run at full speed all the time
- No fans spin after installing a hub
- BIOS shows only one RPM reading
- RGB doesn’t sync
- Frequently Asked Questions
- What is the difference between a fan hub and a fan splitter?
- Can you run two fans off one header?
- How many fans can I put on a fan splitter?
- Will a fan splitter damage my motherboard?
- Do fan splitters reduce fan speed?
- Can I plug a 3-pin fan into a 4-pin hub?
- Where do I connect a fan hub on the motherboard?
- Do I need software to use a fan hub?
- Wrapping Up
Run out of fan headers and you’ve got two options: a splitter cable or a powered hub. They look like they do the same job, but they don’t. A splitter makes every connected fan draw power through one small motherboard header. A hub pulls that power straight from your PSU. Pick the wrong one for your fan count and you’re slowly cooking a part of your motherboard you can’t replace.
This guide covers both: how they work, the amperage math that decides which one you need, the hub types worth buying, and how to install either one.
Quick reference: splitter or hub?
- 🟢 2 standard fans on one header: a 1-to-2 splitter is fine on virtually any board
- 🟢 3 low-draw fans (under 0.75A combined): a 1-to-3 splitter works
- 🟡 3 high-static-pressure fans: do the current math first
- 🔴 4 or more fans from one header: use a SATA-powered hub
- 🔴 RGB or ARGB sync for many fans: use an ARGB PWM hub
- 🔴 Case fans on CPU_FAN: don’t; keep that header for your CPU cooler
Fan Hub vs. Fan Splitter: The Difference
A fan splitter is a passive Y-cable. One connector plugs into a motherboard header, two to four connectors come out the other side. No PCB, no extra power. Every fan on it shares both the header’s speed signal and the header’s current limit.
A fan hub is a small circuit board with a SATA (sometimes Molex) power input. It takes the PWM speed signal from one motherboard header and passes it to all its ports, but the fans draw their power from the PSU. Your motherboard header only carries the control signal, so it never gets overloaded no matter how many fans you add.

| Feature | Fan splitter (unpowered) | Fan hub (powered) |
|---|---|---|
| Power source | Motherboard fan header | PSU via SATA or Molex |
| Load on the header | All fans combined | Control signal only |
| Safe fan count | 2, sometimes 3 | 4 to 10+ |
| Speed control | Shared signal, all fans in sync | Shared signal (basic hubs) or per-channel (smart hubs) |
| RGB/ARGB | No | On ARGB and smart hubs |
| Typical price | $5 to $15 | $10 to $50+ (smart hubs more) |
| Best for | Adding 1 or 2 fans | Full fan arrays and RGB builds |
Fan Header Basics: 3-Pin vs. 4-Pin

3-pin headers (DC control)
Three wires: ground, +12V and tach (the RPM signal back to the board). Speed is controlled by lowering the voltage, typically from about 7V up to 12V. It works, but it’s less precise, and some fans stall or refuse to start at low voltages.
4-pin headers (PWM control)
Adds a fourth wire carrying a PWM signal. Intel’s fan specification puts that signal at 25 kHz. The fan gets a constant 12V and the controller varies the duty cycle, meaning how much of each cycle the motor is switched on. Because the voltage stays at 12V, PWM fans start reliably and can spin slower and quieter than DC-controlled fans.
Mixing 3-pin and 4-pin
A 3-pin fan fits on a 4-pin header, splitter or hub; it just ignores the fourth pin. What happens next depends on the header mode. On a header set to DC mode, the fan’s speed is still controlled. On a PWM-only header or hub, the 3-pin fan runs at full speed all the time. Not dangerous. Just loud. Check your fans before you buy a PWM-only hub.
The Amperage Rule: How Many Fans Can One Header Handle?
This is the part that decides splitter or hub. Every fan header is driven by a small MOSFET on the motherboard, and that MOSFET has a current limit. On most consumer boards it’s 1A at 12V, about 12W per header. Some boards rate specific headers higher (pump headers and some premium Gigabyte boards go to 2A or more), but you shouldn’t assume that without checking.
Exceed the limit and nothing dramatic happens straight away. There’s no warning in the BIOS. The MOSFET runs hot, degrades, and eventually the header dies. That’s why the math matters before you buy.

Typical fan current draw
| Fan type | Typical current | Typical power |
|---|---|---|
| 80mm case fan | 0.10 to 0.15A | 1.2 to 1.8W |
| 120mm case fan | 0.15 to 0.25A | 1.8 to 3.0W |
| 140mm case fan | 0.20 to 0.30A | 2.4 to 3.6W |
| 120mm high-static-pressure fan | 0.25 to 0.40A | 3.0 to 4.8W |
| 200mm case fan | 0.30 to 0.50A | 3.6 to 6.0W |
These are typical ranges. Your fan’s actual rating is printed on the label on the hub of the fan, or in the spec sheet. Use that number, not the table. If you’re still picking fans, our guides to 120mm case fans and the best 140mm case fans list specs for popular models, and case fan sizes explained covers the differences between sizes.
The safe math
- Safe: three standard 120mm fans at 0.20A each = 0.60A. Fine on a 1A header.
- Over the limit: three high-static-pressure fans at 0.40A each = 1.20A. Too much.
- Rule of thumb: if you can’t confirm your header rating, keep the total under 0.75A. That leaves room for the brief current spike when fans start up.
Daisy-chaining splitters doesn’t change the math. Two 1-to-2 splitters on one header still put four fans’ worth of current through that header. At four fans, a hub is the right answer.
How to find your header’s rating
Open your motherboard manual (or the PDF on the manufacturer’s support page) and look for the fan header or fan connector specifications. The rating is listed in amps or watts per header. Many boards list 1A; some list more on specific headers such as pump or high-amp fan headers. Can’t find it? Assume 1A.
How a Fan Splitter Works
All fans get the same speed signal
A splitter doesn’t amplify or divide the control signal; it just connects the fans in parallel. When your board sends a 60% duty cycle, every fan on that splitter runs at 60%. You can’t set one fan faster than another on the same splitter.
Only one fan reports its RPM
Good splitters only connect the tach wire on one output, usually marked or the first connector. Your BIOS shows a single RPM reading for that header, from that one fan. The others spin normally but aren’t monitored. If that one reading shows zero, check the fan on the tach output first.
Does splitting reduce fan speed?
Not by itself. The PWM signal is a digital on/off signal, and sharing it across a few fans doesn’t weaken it. A speed drop only shows up when the combined current pushes the header near its limit and the voltage sags. That’s an overload problem, not a splitter problem.
Group fans that should behave the same
Because everything on a splitter moves together, group fans by job. Three identical front intakes on one splitter is a sensible setup. Mixing intake and exhaust fans, or different fan models with different minimum speeds, makes tuning harder. If you’re planning zones, it’s worth reading up on intake vs. exhaust setup first.
How a Fan Hub Works
A hub has three connections: SATA power from the PSU, one 4-pin cable to a motherboard fan header for the PWM signal, and a row of fan output ports. The hub passes the same PWM signal to every port and feeds the fans from the SATA connector.

Just like a splitter, a basic hub reports only one fan’s RPM. Arctic’s Case Fan Hub is a typical example: ten 4-pin PWM outputs rated at up to 1A each, SATA power input up to 4.5A, all fans on the same PWM signal, and the RPM of the first port reported back to the board.
How many fans can SATA power handle?
A SATA power connector carries 12V on three pins rated at 1.5A each, so 4.5A or about 54W on the 12V rail. That matches Arctic’s 4.5A input rating. Eight fans at 0.3A each is 2.4A, around 29W, well inside that. If the same SATA cable also powers drives, add their draw too; our guide on how many devices a SATA power cable can run covers the math.
Types of Fan Hubs
Basic PWM hub
SATA power in, one PWM input, four to ten fan outputs. No lighting, no software. All fans follow one fan curve from your BIOS. The cheapest and most reliable way to run a lot of fans.
ARGB PWM hub
Adds 3-pin 5V ARGB outputs next to each fan port, plus one ARGB input from your motherboard. Speed and lighting both sync from the board. This is what most RGB builds use. ASUS’s TUF Gaming ARGB PWM Fan Hub, for example, has six PWM and six ARGB ports, is rated at 2A per port and 9A total, and takes power from two SATA connectors.
12V RGB hub
Older-style hubs use 4-pin 12V RGB instead of 3-pin 5V ARGB. The two are not interchangeable. The real danger is plugging a 5V ARGB device into a 12V RGB header: the LEDs get more than double their rated voltage and can burn out instantly. The connectors are keyed differently, but some cheap adapters and “universal” cables make the mistake possible. Our ARGB vs. RGB guide and motherboard RGB header guide explain how to tell them apart.
Smart hubs and controllers
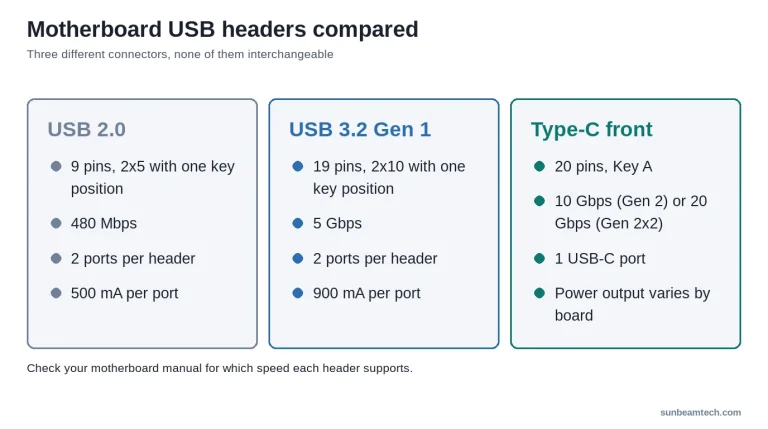
These connect to an internal USB 2.0 header and are controlled through software, which allows separate speed curves per channel, per-fan RPM monitoring and temperature-based profiles. Corsair’s iCUE Commander CORE XT, for example, controls up to six PWM fans and includes two temperature sensors, managed through iCUE. NZXT, Lian Li and others sell similar controllers tied to their own software. The trade-off is a software dependency: the full feature set only works with the vendor’s app running. For a closer look at software-controlled setups, see our PWM fan controller guide.
Built-in case hubs
Many mid-range and high-end cases ship with a fan hub already installed behind the motherboard tray. If yours has one, use it before buying anything.
What to Check Before Buying
For a splitter:
- Pin type: 4-pin PWM for any modern build.
- Outputs: 1-to-2 for simple additions, 1-to-3 only if the math works.
- Tach wiring: a proper splitter connects RPM on one output only. Splitters that connect every tach wire can give your board confusing readings.
- Cable length and quality: check it reaches your header, and prefer thicker wire and firm connectors over the cheapest option.
For a hub:
- Power input: SATA is standard; Molex works but is less common on modern modular PSUs.
- Per-port and total current rating: should comfortably exceed your fans’ combined draw.
- Port count: plan for the fans you’ll add later, not just the ones you have.
- Lighting standard: 5V 3-pin ARGB or 12V 4-pin RGB, matched to your board.
- Software: basic hubs need none; smart hubs need the vendor’s app.
Splitter or Hub: Which Do You Need?
- 1 to 3 fans and free headers: no extra hardware. Plug each fan into its own header.
- 2 fans, one header: 1-to-2 splitter.
- 3 fans, combined draw under 0.75A: 1-to-3 splitter.
- 3 fans over 0.75A, or 4+ fans from one header: SATA-powered hub.
- ARGB sync across many fans: ARGB PWM hub.
- Different speeds per fan group: separate headers, or a smart hub with multiple channels.
Small builds are where hubs earn their keep. Mini-ITX boards often have only two or three fan headers, while a well-cooled small case can fit four to six fans. If you’re planning a compact build, our mini-ITX case guide and how many case fans you need help you size it up.
How to Install a Fan Splitter
- Shut down, switch off the PSU and unplug the power cable.
- Find a free system fan header, labeled SYS_FAN, CHA_FAN or similar. See our motherboard fan headers guide if the labels are unclear.
- Plug the splitter’s single connector into the header. It’s keyed and only fits one way.
- Connect the fans, putting the fan you want to monitor on the output with the tach wire.
- Route and tie down the cables; our cable management guide has tips.
- Boot into the BIOS, check that the header shows an RPM reading, and set your fan curve.
How to Install a Fan Hub
- Power down and unplug the PC.
- Mount the hub. Most use adhesive pads or magnets; behind the motherboard tray is the usual spot.
- Connect the hub’s 4-pin PWM input to a free system fan header. Not CPU_FAN: that header is for your cooler, and our CPU OPT vs. CPU FAN guide explains why.
- Connect a SATA power cable from the PSU to the hub.
- Plug the fans into the hub’s outputs, with the fan you want to monitor on the RPM-reporting port.
- For ARGB hubs, connect each fan’s ARGB cable to the hub and the hub’s ARGB input to a 5V 3-pin header. Check any 5V/12V switch before powering on.
- In the BIOS, set the header to PWM mode and configure your fan curve.
Common Problems and Fixes
Fans run at full speed all the time
Usually 3-pin fans on a PWM-only hub or header. They can’t read the PWM signal. Switch the header to DC mode (if the fans are on a splitter) or replace them with 4-pin fans.
No fans spin after installing a hub
Check the SATA power connection first, then the PWM cable to the motherboard. Some hubs stop the fans when they receive no PWM signal.
BIOS shows only one RPM reading
Expected. Basic hubs and splitters report one fan. If you need per-fan monitoring, you need a smart hub or separate headers.
RGB doesn’t sync
Check the voltage standard first (5V ARGB vs. 12V RGB), then software. Running two RGB apps at once, for example your motherboard’s utility alongside iCUE, is a common cause of flickering or lost sync. For fans where the lights work but the blades don’t, see our fan not spinning but RGB works fix.
Frequently Asked Questions
What is the difference between a fan hub and a fan splitter?
A splitter is a passive cable that shares one motherboard header’s power and speed signal between several fans. A hub is powered from the PSU through SATA and only uses the motherboard header for the speed signal, so it can safely run many more fans.
Can you run two fans off one header?
Yes. Two standard 120mm or 140mm fans typically draw around 0.3 to 0.6A combined, well within the usual 1A header rating. A 1-to-2 splitter is the safest way to add fans without a hub.
How many fans can I put on a fan splitter?
As many as the header’s current rating allows. On a typical 1A header, two fans is safe, three works if their combined draw stays under about 0.75A, and four or more should go on a powered hub.
Will a fan splitter damage my motherboard?
Only if you overload it. Exceeding the header’s rating stresses the component that drives it and can kill the header over time. Staying within the rating is safe.
Do fan splitters reduce fan speed?
No. The PWM signal isn’t weakened by splitting. Speed only drops if the total current overloads the header and the voltage sags.
Can I plug a 3-pin fan into a 4-pin hub?
Yes, it fits. On a PWM-only hub it will run at full speed, because 3-pin fans can’t read the PWM signal.
Where do I connect a fan hub on the motherboard?
The hub’s PWM cable goes to a system fan header (SYS_FAN or CHA_FAN) and its power cable goes to a SATA connector from the PSU. Avoid CPU_FAN, which should stay with your CPU cooler.
Do I need software to use a fan hub?
Not for basic or ARGB hubs; speed follows your BIOS fan curve and lighting follows your motherboard’s RGB software. Smart hubs need the vendor’s app for per-channel control.
Wrapping Up
Count your fans, check the current rating on the labels, and compare it to your header’s limit. Two fans per header: use a splitter. Three: only if the math works. Four or more, or any build with ARGB fans to sync: get a SATA-powered hub and your motherboard never has to carry the load. Five minutes with the manual is a lot cheaper than a dead fan header.

Alex has been building and tweaking custom PCs for over 12 years. From budget builds to full custom water loops, he’s assembled more than 50 systems and helped hundreds of builders troubleshoot their rigs. When he’s not benchmarking the latest hardware, you’ll find him optimizing airflow setups or stress-testing overclocks.