How to Install a GPU (Step by Step)
Installing a GPU means seating a graphics card into your motherboard’s PCIe x16 slot, securing it to the case bracket, connecting PSU power cables, and installing drivers.
Last updated: July 2026
Table of Contents
- Quick Answer: How Do You Install a GPU?
- What You’ll Need Before You Start
- Tools and Materials
- Things to Verify Beforehand
- How to Prepare Your PC for GPU Installation
- Power Down and Disconnect Everything
- Open Your Case
- If You’re Replacing an Old GPU
- How to Install a GPU, Step by Step
- Step 1, Locate the PCIe x16 Slot
- Step 2, Remove the PCIe Slot Cover(s)
- Step 3, Seat the GPU in the PCIe Slot
- Step 4, Secure the GPU to the Case Bracket
- Step 5, Connect the PCIe Power Cables
- Step 6, Close the Case and Reconnect
- First Boot After GPU Installation
- What to Expect on First Boot
- Install GPU Drivers
- Verify the GPU Is Working
- Troubleshooting: GPU Not Working After Install
- FAQ: How to Install a GPU
- Do I need to uninstall old GPU drivers before installing a new GPU?
- Does it matter which PCIe slot I use for my GPU?
- How do I know if my PSU can handle my new GPU?
- Why is there no signal after I installed the GPU?
- How long does it take to install a GPU?
- The Bottom Line
Quick Answer: How Do You Install a GPU?
Power down your PC and unplug it from the wall. Open the side panel, remove the rear bracket cover(s) aligned with the PCIe x16 slot, then press the GPU firmly into the slot until the retention clip clicks. Screw the bracket in place, connect the PCIe power cables from your PSU, close the case, and plug your monitor into the GPU’s output ports. Boot up and install the appropriate drivers. Done.
This is one of the most beginner-friendly upgrades you can do to a PC. Whether you’re dropping a card into a fresh build or swapping out an old GPU for something newer, the physical process is the same. The whole job, including driver installation, takes 30–45 minutes. This guide covers both scenarios: installing into a new build and replacing an existing card.
- 🟢 PSU wattage confirmed sufficient for your GPU tier
- 🟢 Case has enough physical clearance for GPU length
- 🟢 Old GPU drivers removed with DDU (upgrade installs only)
- 🟢 Monitor cable connected to GPU ports, not motherboard
- 🟡 PCIe power cables from separate PSU rails on high-end cards
- 🟡 Anti-static precautions taken before handling hardware
- 🔴 Never force the GPU into the slot or overtighten bracket screws
- 🔴 16-pin (12VHPWR) connector must be fully seated on RTX 40/50 series
What You’ll Need Before You Start
Tools and Materials
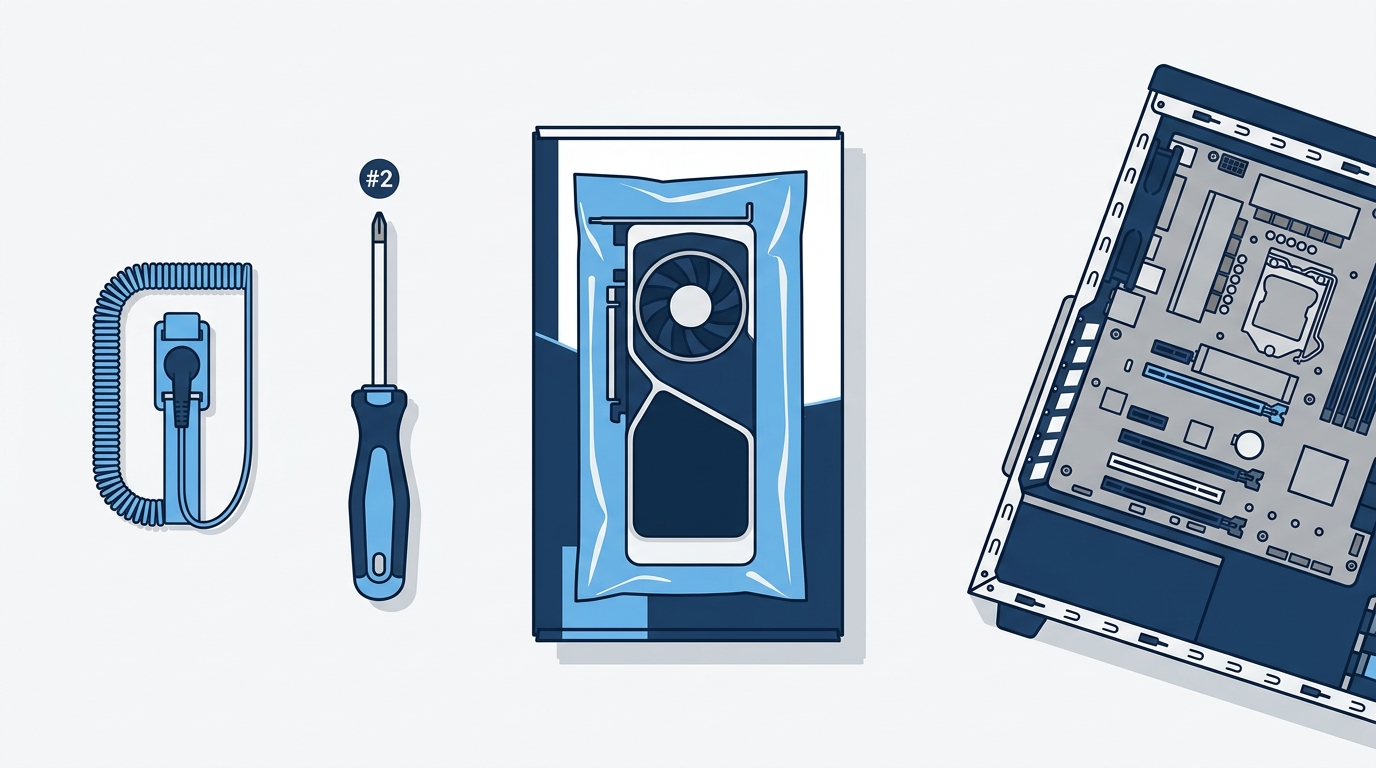
You don’t need much. Here’s what to have on hand before you start:
- Phillips-head screwdriver (#2): for bracket screws and side panel
- Anti-static wrist strap: optional but worth using if you’re on carpet or in a dry environment
- Your new GPU: keep it in the anti-static bag until you’re ready to install
- The GPU’s manual: check the required PCIe power connectors before you even open your case
Things to Verify Beforehand
Before you pull anything apart, confirm three things: your PSU can handle the card, your case can physically fit it, and your motherboard has a PCIe x16 slot. Most modern motherboards do. An x8 slot will technically work but can reduce performance in bandwidth-sensitive workloads like professional rendering.
GPU length is the compatibility issue people miss most often. Check your GPU’s listed dimensions against your case’s maximum GPU clearance spec. A 340mm flagship won’t fit in a case with 300mm clearance. Simple check, easy to overlook.
| GPU Tier | Example Cards | Power Connectors | Min. PSU Recommended |
|---|---|---|---|
| Entry-level | RTX 4060, RX 7600, RX 9060 XT | 1x 8-pin or 16-pin | 550W |
| Mid-range | RTX 4070, RX 7700 XT, RX 9070 | 1–2x 8-pin or 16-pin | 650W |
| High-end | RTX 4080 Super, RX 9070 XT, RTX 5080 | 2–3x 8-pin or 16-pin | 850W |
| Flagship | RTX 4090, RTX 5090 | 1x 16-pin (600W) or 3x 8-pin | 1000W+ |
If you’re unsure whether your PSU is up to the task, the modular vs non-modular PSU guide covers wattage ratings, rail configurations, and what to look for when evaluating an existing unit.
How to Prepare Your PC for GPU Installation
Power Down and Disconnect Everything
Shut down completely, not sleep, not hibernate. Full shutdown. Then unplug the power cable from the wall. Press the power button once with the cable unplugged to discharge any residual electricity stored in the capacitors. Disconnect your monitor, keyboard, mouse, and any USB devices. Clean slate before you open the case.
Open Your Case
Most cases use two or three thumbscrews on the rear-left edge to secure the side panel. Others are tool-less with a latch or slide mechanism. Once the panel is off, lay the case on its side with the motherboard facing up. This makes GPU installation much easier. Ground yourself by touching a metal part of the case chassis before reaching inside.
If You’re Replacing an Old GPU
Don’t skip this step. According to contributors at the Tom’s Hardware Forums, the right sequence is to remove your existing drivers before you touch the hardware, not after. Use Display Driver Uninstaller (DDU) in Safe Mode. Select your GPU brand, click “Clean and Restart,” and let it do its thing. Driver conflicts after a GPU swap are the number one cause of post-install headaches, particularly when crossing brands from NVIDIA to AMD or vice versa.
Also: before removing the old card, download the new GPU’s drivers onto a USB drive or your local storage. You’ll want them ready after the new card is seated.
How to Install a GPU, Step by Step
Step 1, Locate the PCIe x16 Slot
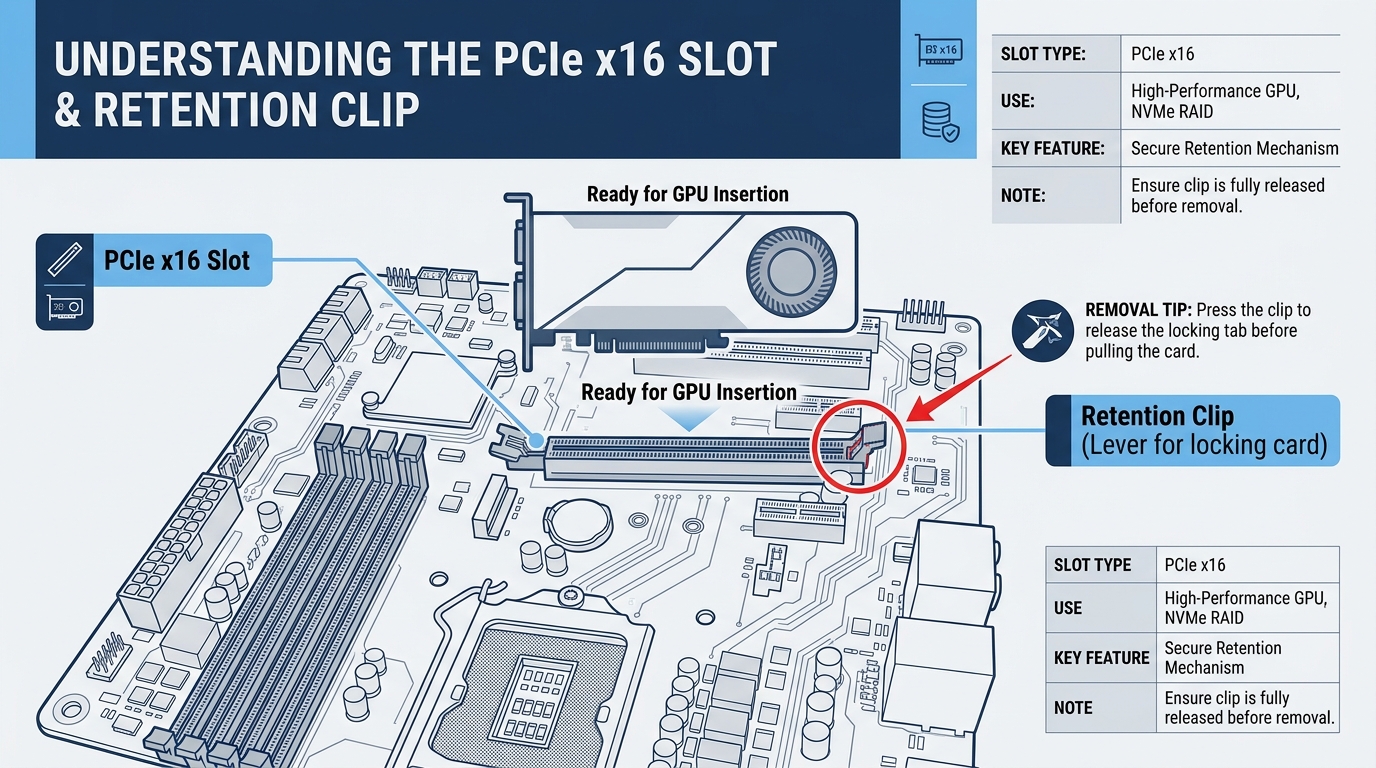
The primary PCIe x16 slot is the longest expansion slot on your motherboard, positioned closest to the CPU socket. That’s your target. If your board has multiple PCIe slots, ignore the shorter x1 slots and the secondary x16 slot (physically x16 but may run at x8 or x4 electrically). For gaming and everyday use, the top primary slot is always the right choice.
Step 2, Remove the PCIe Slot Cover(s)
Look at the rear of your case. You’ll see a row of metal bracket covers (sometimes called I/O slot covers) aligned with the expansion slots. You need to remove the ones that line up with your PCIe x16 slot. Most GPUs are dual-slot, so remove two. Triple-slot cards need three. Keep the screws, you’re reusing them to secure the GPU.
Some cases use snap-out brackets that don’t have screws. Flex them out. They’re single-use and won’t go back cleanly, so make sure you’re removing the right ones before you break anything off.
Step 3, Seat the GPU in the PCIe Slot
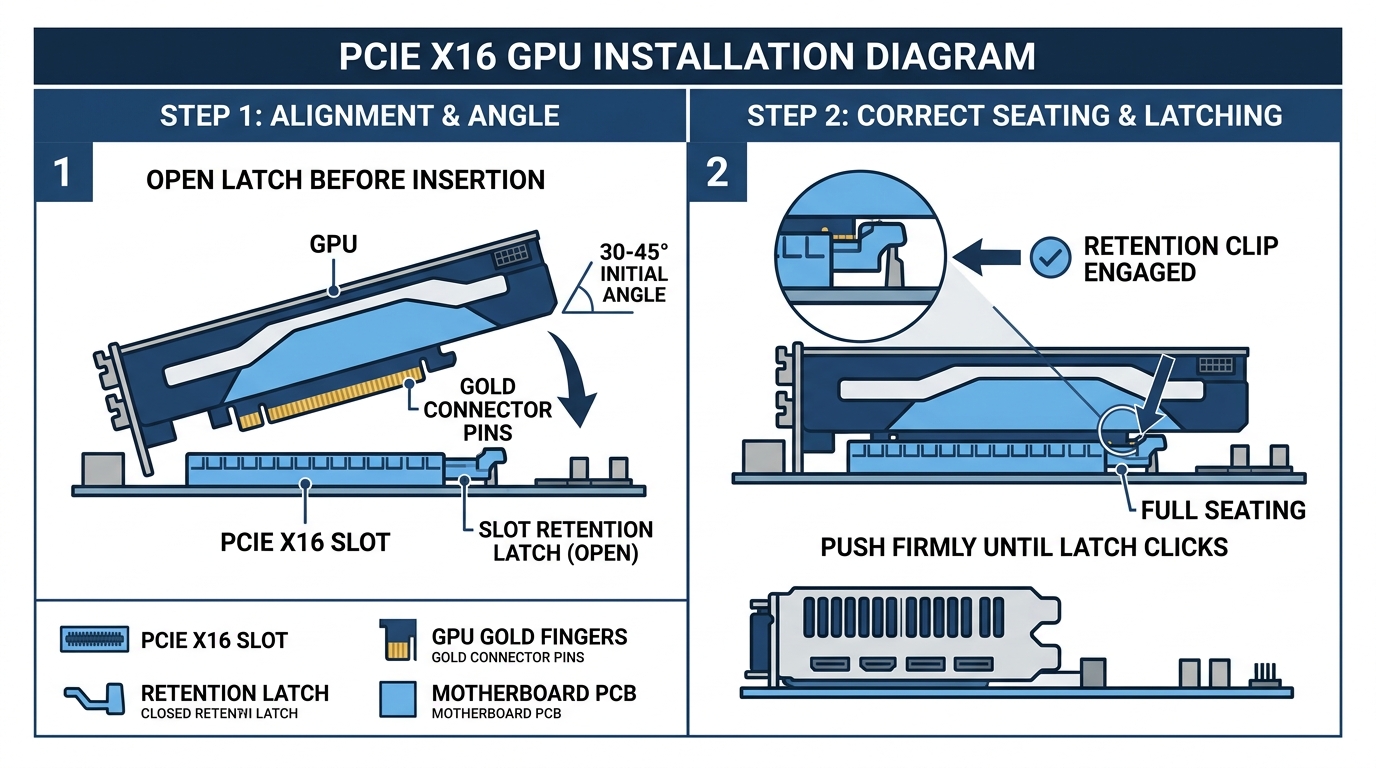
Remove the GPU from its anti-static bag. Hold it by the edges, not by the fans or PCB components. Line up the gold connector edge on the bottom of the GPU with the PCIe x16 slot. Apply firm, even pressure straight down until you hear or feel the retention clip at the end of the slot click into place.
That click matters. A lot. If you don’t seat it fully, you’ll either get no display output or the system won’t POST at all. No display after install? This is the first thing to check. Push it down more firmly than you think is necessary, it takes more force than RAM installation.
Step 4, Secure the GPU to the Case Bracket
Take the screws you removed in Step 2 and drive them into the GPU’s metal rear bracket, securing it to the case. Snug is enough. Don’t overtighten, you can crack the bracket or strip the screw holes. Two screws for most GPUs, sometimes one on very compact cards.
For large three-slot flagship cards, GPU sag is a real concern over time. A GPU sag bracket supports the card from below and prevents stress on the PCIe slot. Not critical on day one, but worth adding if you’re running something heavy like an RTX 5090.
Step 5, Connect the PCIe Power Cables
Check the table from earlier for how many connectors your card needs. Plug in the correct number of PCIe power cables from your PSU. On a modular PSU, grab the cables labeled PCIe or VGA. On a non-modular unit, they’re already attached.
One important note on RTX 40-series and RTX 50-series cards using the 16-pin 12VHPWR connector: seat it until it clicks fully. Partial seating of this connector was responsible for early RTX 4090 cable melt incidents in 2022. If it doesn’t feel locked in, remove it and reseat it. The connector is designed to click, if it hasn’t, it isn’t fully home.
On high-end cards requiring multiple 8-pin connectors, use cables from separate rails on your PSU, not two connectors daisy-chained from the same cable. Your PSU manual will clarify rail configuration.
Step 6, Close the Case and Reconnect
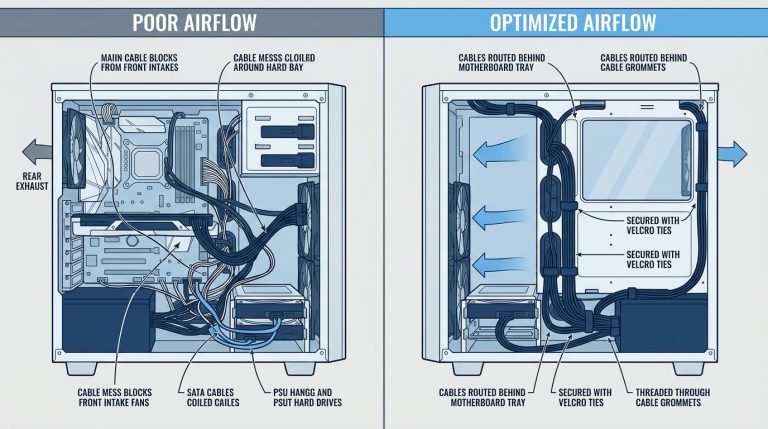
Route your cables away from fans before replacing the side panel. A little cable management now saves airflow problems later, if you want to go deeper on this, the PC cable management guide covers routing techniques for GPU power cables specifically.
Replace the side panel and reconnect your monitor. Here’s where beginners trip up every single time: plug the monitor cable into the GPU’s output ports on the rear of the case, not the motherboard’s display outputs. The motherboard ports are disabled when a discrete GPU is installed. If you get no signal, this is the first thing to check.
First Boot After GPU Installation
What to Expect on First Boot
Your system will likely boot at low resolution with a generic display driver. That’s normal. Windows detects new hardware and loads a basic driver automatically. Before installing GPU-specific drivers, it’s worth going into BIOS first to confirm the card is recognized under PCIe or display settings.
If you were previously using integrated graphics (iGPU) from a CPU like a Ryzen 8000G or Intel Core Ultra 200 with integrated graphics, head into BIOS and set Primary Display to PCIe or PEG. Some boards will automatically prioritize the discrete GPU, but not all do.
Install GPU Drivers
Download and install the driver package for your card:
- NVIDIA: GeForce Game Ready or Studio Driver from nvidia.com/drivers
- AMD: Adrenalin Software from amd.com/support
- Intel Arc: Arc Control software from Intel’s discrete GPU software page
During NVIDIA installation, check the box for “Perform a clean installation” to wipe any leftover driver fragments. AMD’s installer offers a similar factory reset option. Use it. Restart after the driver install completes.
Verify the GPU Is Working
Open Device Manager (right-click Start, select Device Manager), expand Display Adapters, and confirm your GPU is listed by name without a yellow warning triangle. If it’s showing as “Microsoft Basic Display Adapter,” the driver didn’t install correctly. Run DDU and reinstall.
For a deeper check, download GPU-Z (free). It shows your card’s full specs, VRAM capacity, and critically, what PCIe slot width the card is running at. You want to see x16. Seeing x4 means you’re in the wrong slot. Run a game or a quick benchmark to confirm real-world performance is where it should be. Keeping an eye on temperatures after the install is smart too, knowing your normal GPU temperature ranges while gaming helps you catch any cooling issues early.
Troubleshooting: GPU Not Working After Install
| Problem | Most Likely Cause | Fix |
|---|---|---|
| No display output | Monitor plugged into motherboard port | Move cable to GPU output ports |
| No display output | GPU not fully seated in slot | Reseat GPU, confirm retention clip clicked |
| System won’t POST | Insufficient PSU wattage | Verify PSU rating against GPU TDP requirements |
| GPU not in Device Manager | Driver conflict or failed install | Run DDU in Safe Mode, reinstall drivers |
| Artifacting or crashes | PCIe power cable not fully seated | Reseat all PCIe power connectors firmly |
| Low FPS / running at PCIe x4 | GPU in secondary slot | Move GPU to primary PCIe x16 slot |
| GPU fans not spinning at idle | Normal semi-passive cooling behavior | Fans spin up under load, no action needed |
FAQ: How to Install a GPU
Do I need to uninstall old GPU drivers before installing a new GPU?
Yes, especially if you’re switching brands (NVIDIA to AMD or AMD to NVIDIA). Leftover driver files from the old GPU can cause conflicts, crashes, and instability with the new card. Use Display Driver Uninstaller (DDU) in Safe Mode to wipe everything cleanly before swapping hardware. Even within the same brand, using DDU is good practice when doing a major upgrade.
Does it matter which PCIe slot I use for my GPU?
Yes. Always install your GPU in the primary PCIe x16 slot, which is the longest slot positioned closest to the CPU. Secondary slots typically run at x8 or x4 bandwidth, which can reduce performance in GPU-heavy tasks. The only reason to use a secondary slot is if your primary slot is physically blocked by a large CPU cooler or other component.
How do I know if my PSU can handle my new GPU?
Add your CPU’s TDP to your GPU’s TDP, then add around 100W for everything else in the system (storage, RAM, fans, motherboard). Your PSU should have at least 20% headroom above that total. Example: an RTX 5080 (360W TDP) paired with a Ryzen 9 9950X3D (170W) plus 100W for other components equals roughly 630W. An 850W PSU gives you comfortable headroom there.
Why is there no signal after I installed the GPU?
The most common reason is the monitor cable being connected to the motherboard’s display output instead of the GPU’s ports. The motherboard outputs are disabled when a discrete GPU is installed. If your cables are correct, check that the GPU is fully seated in the PCIe slot and that the retention clip has clicked. A partially seated GPU is the second most common cause of no-signal issues.
How long does it take to install a GPU?
The physical installation takes 10–20 minutes for most people. Add another 15–20 minutes for driver download, installation, and restarting, and you’re looking at 30–45 minutes total from start to gaming. If you’re also running DDU to remove old drivers first, budget 45–60 minutes to be comfortable.
The Bottom Line
The process breaks down to three phases: prep your system (remove old drivers, confirm PSU headroom and clearance), do the physical install (seat the card, secure the bracket, connect power), and finish in software (install drivers, verify detection). Each phase has one or two steps where beginners go wrong, the monitor cable, the PCIe retention clip, the 12VHPWR connector. Now you know exactly what those are. Follow the steps in order, run GPU-Z after boot to confirm everything looks right, then fire up a game and see what your new card can actually do.

Alex has been building and tweaking custom PCs for over 12 years. From budget builds to full custom water loops, he’s assembled more than 50 systems and helped hundreds of builders troubleshoot their rigs. When he’s not benchmarking the latest hardware, you’ll find him optimizing airflow setups or stress-testing overclocks.