How to Enable TPM 2.0 in BIOS (Every Brand, Step by Step)
Enable TPM 2.0 by turning on PTT (Intel) or fTPM/AMD CPU fTPM (AMD) in your BIOS, usually under Advanced, Security, or Trusted Computing, then save and reboot.
Last updated: September 2026
Table of Contents
- What TPM 2.0 Actually Is (and Why Windows 11 Wants It)
- Before You Touch Anything
- How to Enable TPM 2.0, Brand by Brand
- ASUS
- MSI
- Gigabyte
- ASRock
- Laptops and Prebuilts
- How to Check If TPM 2.0 Is Already Enabled
- It Didn’t Work: Troubleshooting
- The PTT or fTPM Option Is Missing or Greyed Out
- Windows Still Says the PC Doesn’t Meet Requirements
- PC Won’t Boot at All After Enabling TPM
- Stuttering or a New TPM Attestation Error After Enabling fTPM
- You Have a Physical TPM Header but No Module
- SVM or Virtualization Settings Interfering
- Frequently Asked Questions
- How do I enable TPM 2.0 on Windows 11?
- Can I enable TPM 2.0 on Windows 10?
- Can I add a TPM to an existing PC that does not support it?
- How can I tell if TPM 2.0 is already enabled without going into BIOS?
- Does enabling TPM 2.0 delete my files or wipe my drive?
- Is TPM 2.0 the same thing as Secure Boot?
- Do I need TPM 2.0 for gaming?
- My motherboard is a few years old. Does it support TPM 2.0 at all?
If Windows 11 setup stopped on “This PC can’t run Windows 11” and pointed at TPM, or an anti-cheat error is blocking a game, the fix is usually one BIOS setting. Most current desktop platforms have TPM 2.0 built into the CPU firmware, and on newer boards it’s often already switched on. On older boards, or after a BIOS reset, you may need to turn it on yourself. This guide covers the exact menu path for ASUS, MSI, Gigabyte and ASRock, plus what to do when the option is missing or Windows still doesn’t see it.
- 🟢 Intel: enable PTT under Advanced > PCH-FW Configuration, or Security > Trusted Computing
- 🟢 AMD: enable fTPM (sometimes labeled AMD CPU fTPM) under Advanced > AMD fTPM or CPU Configuration
- 🟡 If you use BitLocker, suspend it before changing this setting, then resume it afterward
- 🔴 Do not clear or disable TPM on a drive that is already BitLocker-encrypted without your recovery key in hand
What TPM 2.0 Actually Is (and Why Windows 11 Wants It)
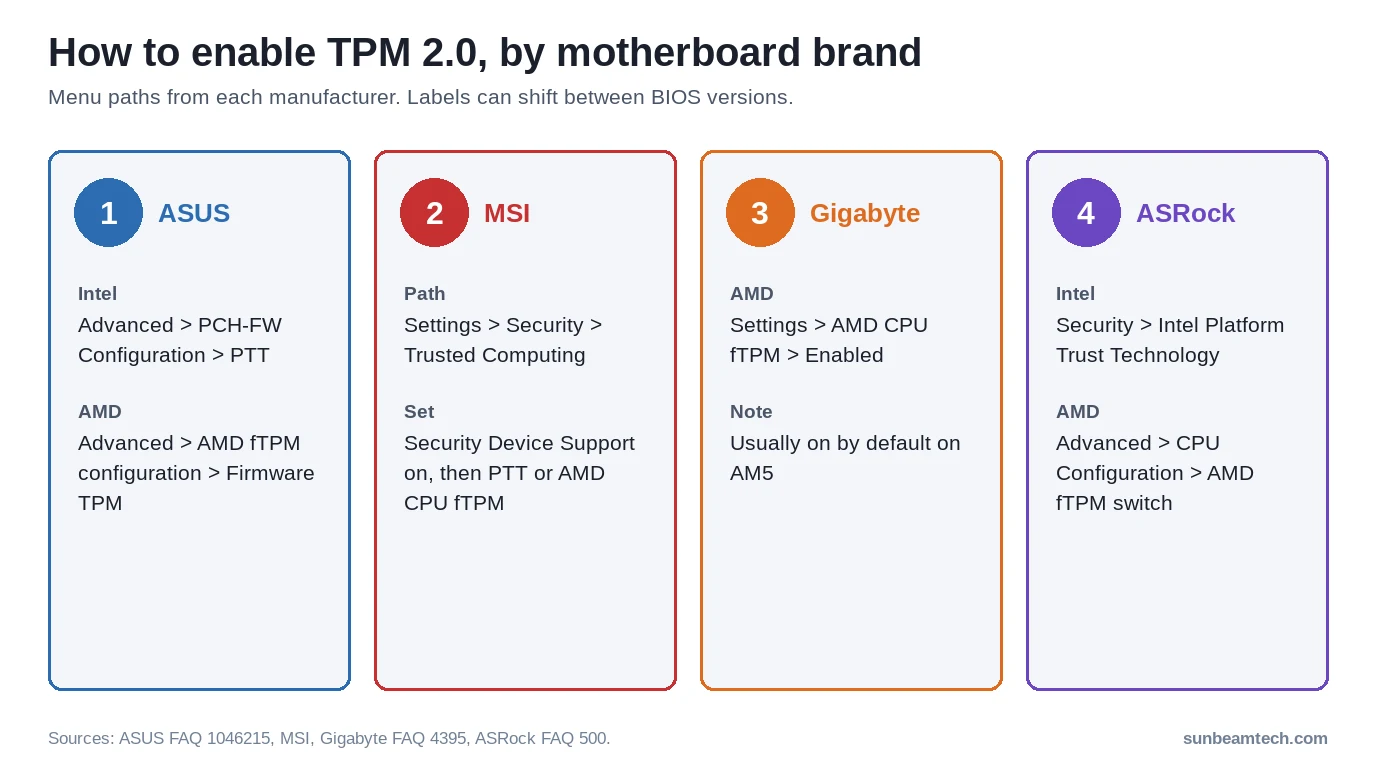
A Trusted Platform Module is, in Intel’s own description, “a physical or embedded security technology (microcontroller) that resides on a computer’s motherboard or in its processor” and uses cryptography to protect sensitive data and verify the platform. Older boards did this with a separate chip. Current CPUs do it in firmware: Intel calls its version Platform Trust Technology (PTT), AMD calls its version fTPM. Both count as TPM 2.0, and ASRock confirms you don’t need a hardware module for it. Having PTT or fTPM doesn’t automatically mean Windows 11 support, though: MSI points out that Intel 6th and 7th Gen and Ryzen 1000 processors aren’t on Microsoft’s Windows 11 CPU list.
Microsoft’s official Windows 11 requirements list “TPM version 2.0” alongside a 1 GHz 64-bit processor with two or more cores and firmware that is “UEFI, Secure Boot capable.” If you are chasing the TPM requirement specifically, note that Windows 11 setup checks for Secure Boot at the same time, so both settings usually need attention in the same sitting.
Before You Touch Anything
Two things are worth doing before you go into BIOS.
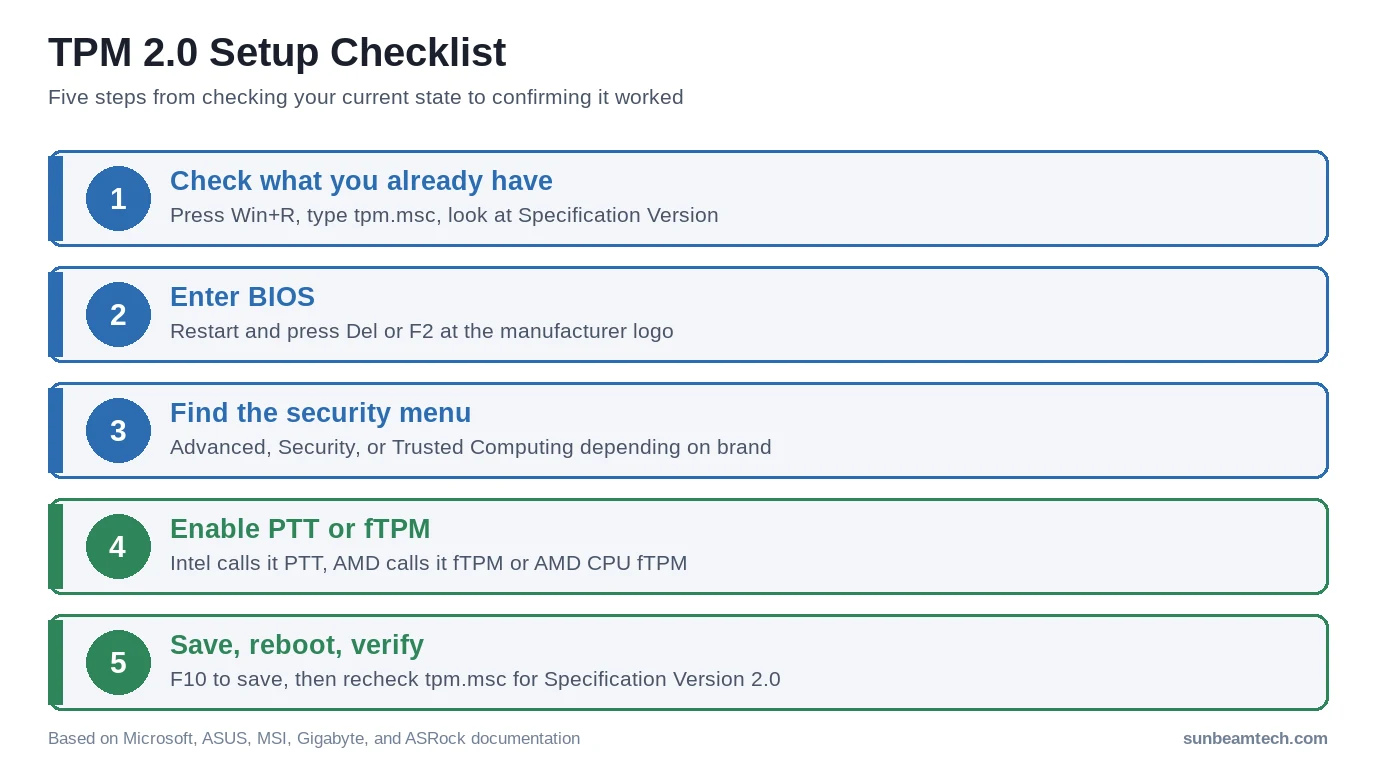
First, check what you already have. Press Win+R, type tpm.msc, and press Enter. If it opens and shows “Specification Version: 2.0,” you are already done and the setup failure has a different cause. If it says the TPM cannot be found, the setting is currently off.
Second, if BitLocker is already protecting your drive, changing firmware TPM settings can change the PCR (Platform Configuration Register) values BitLocker relies on, and that triggers a recovery key prompt on next boot. Microsoft’s own troubleshooting documentation for TPM and UEFI firmware changes recommends suspending BitLocker first with Suspend-BitLocker -MountPoint "C:" -RebootCount 0 in PowerShell, making the change, then resuming it with Resume-BitLocker -MountPoint "C:". Have your 48-digit recovery key saved somewhere outside that PC regardless. It is free to look up in your Microsoft account and takes thirty seconds; it is not something you want to be searching for at 1 AM.
How to Enable TPM 2.0, Brand by Brand
Enter BIOS the same way regardless of brand: restart the PC and tap Delete or F2 repeatedly right after the power button, before Windows starts loading. If you miss the window, Windows 11 also has a menu route: Settings > System > Recovery > Advanced startup > Restart now, then Troubleshoot > Advanced options > UEFI Firmware Settings > Restart.
ASUS
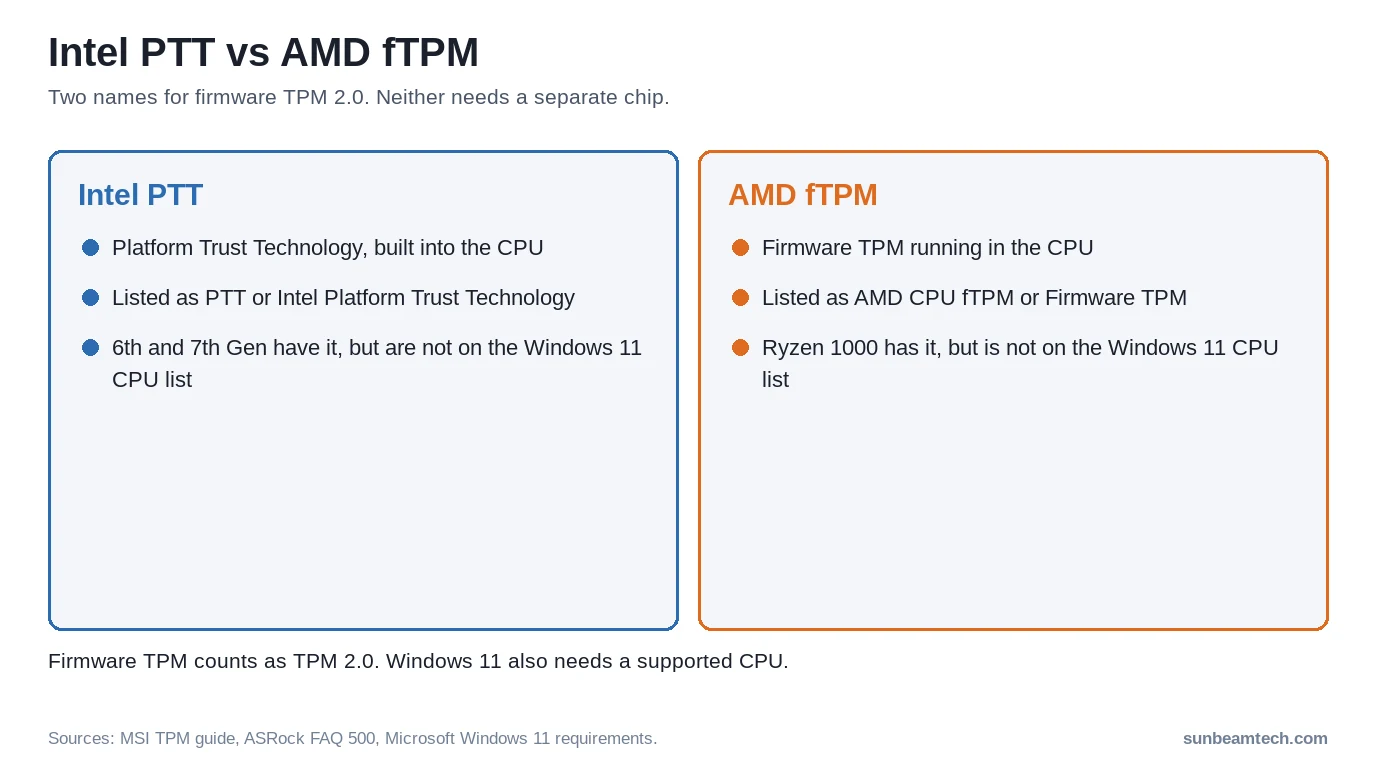
Press F7 or select Advanced Mode once inside BIOS. On Intel boards, go to Advanced > PCH-FW Configuration and set PTT to Enabled. On AMD boards, go to Advanced > AMD fTPM configuration and switch TPM Device Selection to Firmware TPM. Press F10 to save and restart. ASUS’s own Windows 11 TPM 2.0 setup FAQ maintains a list of which specific motherboards ship with TPM 2.0 bundled and which BIOS version each needs, worth a check if the option is missing entirely.
MSI
On Click BIOS 5, go to Settings > Security > Trusted Computing. On boards with the simpler Click BIOS (GSE Lite) it’s Security > Trusted Computing. Set Security Device Support to Enabled, then choose PTT on Intel or AMD CPU fTPM on AMD. Press F10 to save; when you go back into the BIOS, the same menu shows the TPM version, per MSI’s own instructions.
Gigabyte
On AMD boards, switch to Advanced Mode, open Settings and set AMD CPU fTPM to Enabled, then save with F10. Gigabyte’s FAQ describes this for AM4 and sTRX4 boards and notes that on newer AM5 and sTR5 platforms running Windows 11, TPM and Secure Boot are typically enabled by default. On Intel boards the option is called Intel Platform Trust Technology (PTT); your manual shows where it sits on your model.
ASRock
Intel boards: go to the Security page and enable Intel Platform Trust Technology. AMD boards: go to Advanced > CPU Configuration and set the AMD fTPM switch to AMD CPU fTPM. ASRock’s FAQ also recommends disabling CSM before using PTT or fTPM for a new Windows 11 installation.
Laptops and Prebuilts
Dell, HP, and Lenovo systems all expose the same underlying Intel PTT or AMD fTPM setting, just under different menu names in their own UEFI screens. Microsoft’s TPM support page links directly to each manufacturer’s instructions rather than trying to standardize wording across them, which is the more reliable path than a generic third-party walkthrough if you own one of those systems. The setting itself is still one toggle, usually under a Security tab.
How to Check If TPM 2.0 Is Already Enabled
After saving and rebooting into Windows, run tpm.msc again. Under Status it should read “The TPM is ready for use,” and under TPM Manufacturer Information, Specification Version should read 2.0. If you would rather stay in BIOS to confirm, go back to the same Trusted Computing or Security menu you just changed; most boards show the current TPM state right there once it is active.
It Didn’t Work: Troubleshooting
The PTT or fTPM Option Is Missing or Greyed Out
First check that your board and BIOS version support it. ASUS keeps a list of supported models with the BIOS version each needs, and an older BIOS may simply not have the option yet, so a BIOS update is often the fix. ASRock recommends disabling CSM before using PTT or fTPM for a Windows 11 install, so if CSM is still on, switch it off; our CSM setting guide covers when that’s safe. On boards with a TPM header, also check that the TPM device selection is set to the firmware TPM rather than a discrete module you don’t have.
Windows Still Says the PC Doesn’t Meet Requirements
TPM 2.0 is one of three things Windows 11 setup checks together: TPM 2.0, a Secure Boot capable UEFI, and a supported CPU generation. Enabling fTPM or PTT alone will not pass the check if Secure Boot is still off, or if the processor itself predates Microsoft’s supported CPU list. Check the other two before assuming TPM is still the blocker. While you are in the BIOS anyway, this is also a reasonable time to check whether XMP is enabled and whether Fast Boot is set the way you want, since both live in the same general area.
PC Won’t Boot at All After Enabling TPM
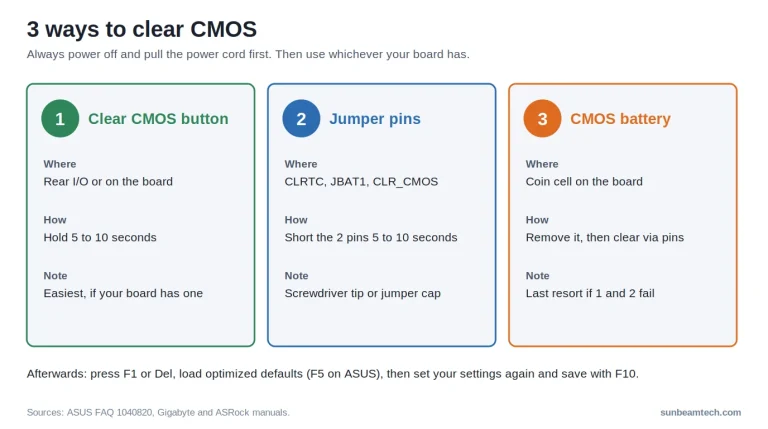
This is rare, since PTT and fTPM are pure firmware toggles with no dependency on physical hardware, but it does happen on a handful of older BIOS versions with a buggy Trusted Computing implementation. If the system fails to POST after saving the change, our PC won’t turn on checklist covers the CMOS clear that reverts this setting, and every other recent BIOS change, back to defaults in one step.
Stuttering or a New TPM Attestation Error After Enabling fTPM
Some AMD systems showed brief, periodic stutters with fTPM enabled. AMD acknowledged the issue and it was fixed through motherboard BIOS updates, so if you notice stutter after enabling fTPM, update your BIOS before anything else. The same goes for TPM attestation errors in Windows: check your motherboard maker’s support page for a newer BIOS first; re-toggling the setting rarely helps.
You Have a Physical TPM Header but No Module
Many boards also have a TPM header for an optional discrete module. You don’t need one: firmware TPM (PTT or fTPM) meets the TPM 2.0 requirement on its own, as ASRock confirms. The header exists for setups that specifically want a separate chip, not for typical home or gaming use.
SVM or Virtualization Settings Interfering
TPM and virtualization settings are unrelated but sit near each other on AMD boards and get confused with each other in forum threads. If you are troubleshooting a Windows 11 setup failure and see mentions of Hyper-V or Credential Guard, that is a separate setting; see our SVM mode explainer for what that one actually controls.
Frequently Asked Questions
How do I enable TPM 2.0 on Windows 11?
You do it in BIOS, not in Windows. Enter BIOS at startup, find PTT (Intel) or fTPM (AMD) under Advanced, Security, or Trusted Computing, set it to Enabled, then save and reboot. Windows itself has no toggle for this since TPM is a firmware-level feature.
Can I enable TPM 2.0 on Windows 10?
Yes. The BIOS setting is identical regardless of which Windows version is installed. Windows 10 supports TPM 2.0 too; Windows 11 simply made having it a hard installation requirement.
Can I add a TPM to an existing PC that does not support it?
Only if the motherboard has a TPM header and the maker sells a matching module for it. If the board and CPU have no firmware TPM and no header, there is no software fix. Keep in mind that Windows 11 also needs a CPU on Microsoft’s supported list, so adding a TPM alone may not be enough.
How can I tell if TPM 2.0 is already enabled without going into BIOS?
Press Win+R, type tpm.msc, and press Enter. It reports the current status and specification version directly from Windows without touching firmware settings.
Does enabling TPM 2.0 delete my files or wipe my drive?
No, enabling it does not touch your files. The risk is indirect: if BitLocker is already active on the drive, the firmware change can trigger a recovery key prompt on the next boot. That is solved by having your recovery key ready, or by suspending BitLocker first, not by anything the TPM setting itself does to your data.
Is TPM 2.0 the same thing as Secure Boot?
No, they are two separate BIOS settings that Windows 11 happens to require together. TPM 2.0 is a security processor for storing keys and verifying platform integrity. Secure Boot is a separate check that only allows signed, trusted software to run during startup. Our Secure Boot guide covers that setting specifically.
Do I need TPM 2.0 for gaming?
Not for gaming itself, but several major anti-cheat systems now require it alongside Secure Boot, since both feed into verifying that the boot chain has not been tampered with. If a game refuses to launch citing a security or anti-cheat error, TPM state is one of the first things worth checking even if the error message does not mention it by name.
My motherboard is a few years old. Does it support TPM 2.0 at all?
Most boards from the Windows 10 and 11 era have firmware TPM (PTT or fTPM) and only need the setting switched on. MSI notes that Intel 6th and 7th Gen and Ryzen 1000 CPUs have firmware TPM as well, but they aren’t on Microsoft’s Windows 11 CPU list. For your exact model, check the ASUS or ASRock support lists linked above, or your board’s manual.
If none of this gets TPM showing as active, the next step is a motherboard BIOS update from the manufacturer’s support page, since some very early BIOS versions for a given board shipped before firmware TPM support was added at all. When you do contact support, have your exact motherboard model, current BIOS version, and the specific error code or message ready. That single detail is usually what separates a five-minute support ticket from a long back-and-forth.

Alex has been building and tweaking custom PCs for over 12 years. From budget builds to full custom water loops, he’s assembled more than 50 systems and helped hundreds of builders troubleshoot their rigs. When he’s not benchmarking the latest hardware, you’ll find him optimizing airflow setups or stress-testing overclocks.