Fast Boot in BIOS: What It Does and When to Disable It
Fast Boot is a UEFI/BIOS setting that reduces startup time by skipping portions of the Power-On Self-Test (POST), including full hardware initialization, USB enumeration, and memory training.
Last updated: June 2026
Table of Contents
- Quick Answer: What Is Fast Boot in BIOS?
- What Does Fast Boot Do in BIOS?
- The Normal POST Process vs. Fast Boot POST
- How the BIOS Stores Cached Hardware Data
- Fast Boot in BIOS vs. Windows Fast Startup: Are They the Same Thing?
- Should You Enable Fast Boot in BIOS?
- When to Keep Fast Boot Enabled
- When to Disable Fast Boot in BIOS
- Does Fast Boot Affect Gaming Performance?
- How to Disable Fast Boot in BIOS: Brand-by-Brand Guide
- How to Disable Fast Boot on ASUS Motherboards
- How to Disable Fast Boot on HP Systems
- How to Disable Fast Boot on Dell Systems
- How to Disable Fast Boot on Lenovo Systems
- How to Enable Fast Boot in BIOS (General Steps)
- Fast Boot and RAM Overclocking: Why You Should Be Careful
- Frequently Asked Questions About Fast Boot in BIOS
- What is Fast Boot in BIOS?
- Should Fast Boot be enabled or disabled in BIOS?
- Does Fast Boot in BIOS affect performance?
- Is Fast Boot in BIOS the same as Windows Fast Startup?
- Where is Fast Boot in BIOS?
- Wrapping Up
Quick Answer: What Is Fast Boot in BIOS?
Fast Boot is a firmware setting that lets your PC skip most of the hardware checks it normally runs before loading Windows. Instead of re-testing RAM, enumerating USB ports, and initializing every device from scratch on each power cycle, your BIOS reads cached results from the last successful boot and jumps straight to the OS. For stable, unchanged systems, this shaves 10 to 25 seconds off every startup. For overclockers, troubleshooters, and anyone plugging in a USB boot drive, it can quietly cause real problems.
What Does Fast Boot Do in BIOS?
To understand what Fast Boot actually skips, you need to know what a normal POST does first.
The Normal POST Process vs. Fast Boot POST
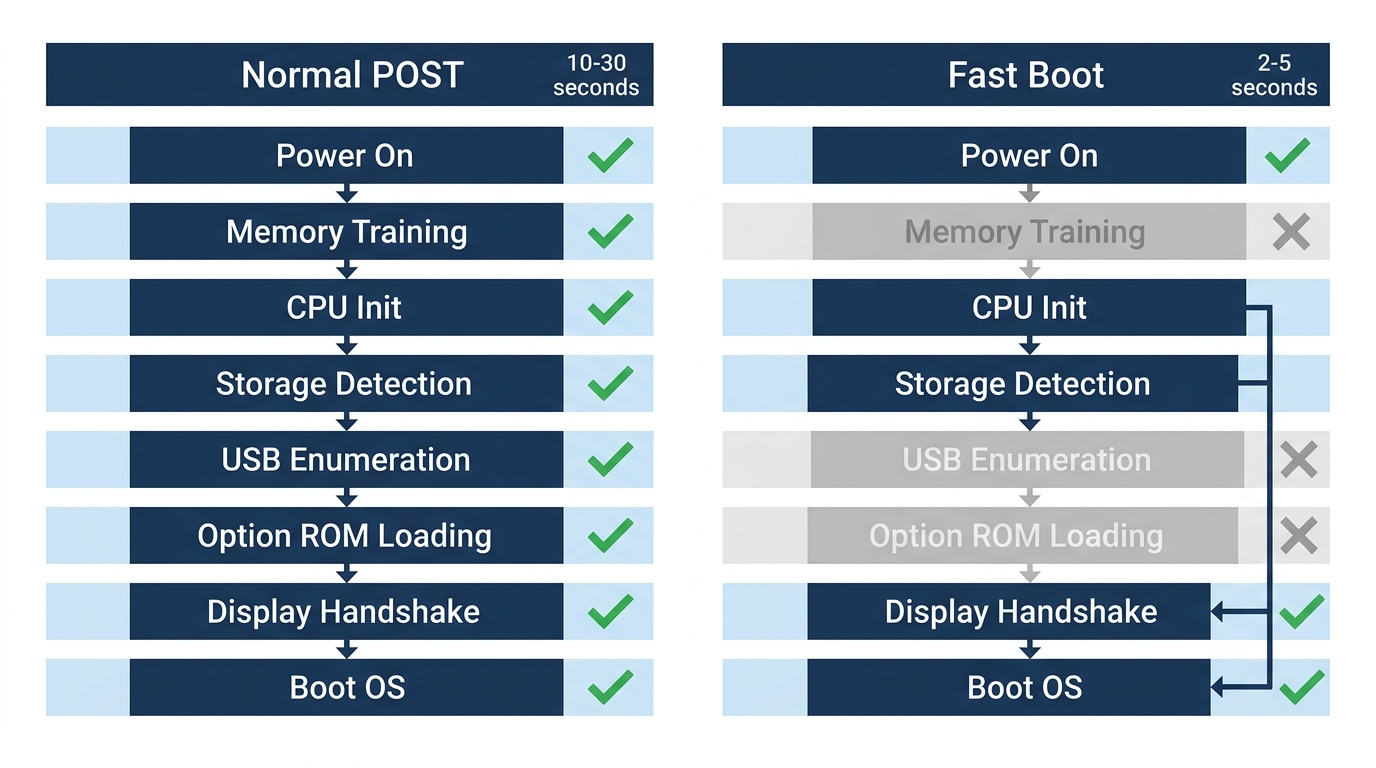
Every time you power on a PC, the firmware runs a Power-On Self-Test. This sequence checks that your hardware is present, responsive, and within spec before handing control to the bootloader. A full POST typically includes:
- Memory training: the controller tests RAM modules, establishes timing parameters, and verifies stability at the configured speed
- CPU initialization: microcode is loaded, core states are verified, and frequency scaling is configured
- Storage detection: NVMe, SATA, and M.2 devices are enumerated and prioritized
- USB device enumeration: every USB port is scanned for connected devices
- Option ROM loading: expansion cards (GPUs, NICs, RAID controllers) load their own initialization firmware
- Display handshake: the GPU negotiates output parameters with the connected monitor
On a typical mid-range system, all of that takes 10 to 30 seconds. On older hardware with multiple drives and expansion cards, it can push 45 seconds. Fast Boot compresses that to 2 to 5 seconds by skipping most of it.
Specifically, here’s what gets skipped with Fast Boot enabled:
- Full memory training: cached training data is used instead of re-running the sequence
- USB re-enumeration: on many boards, USB devices aren’t scanned at POST, which is why bootable drives go invisible
- Some Option ROM loading: GPU and PCIe card firmware may not fully initialize
- POST splash screen: shortened or removed entirely, leaving a narrow window to press hotkeys
Not fast. Just skipped. There’s a difference.
How the BIOS Stores Cached Hardware Data
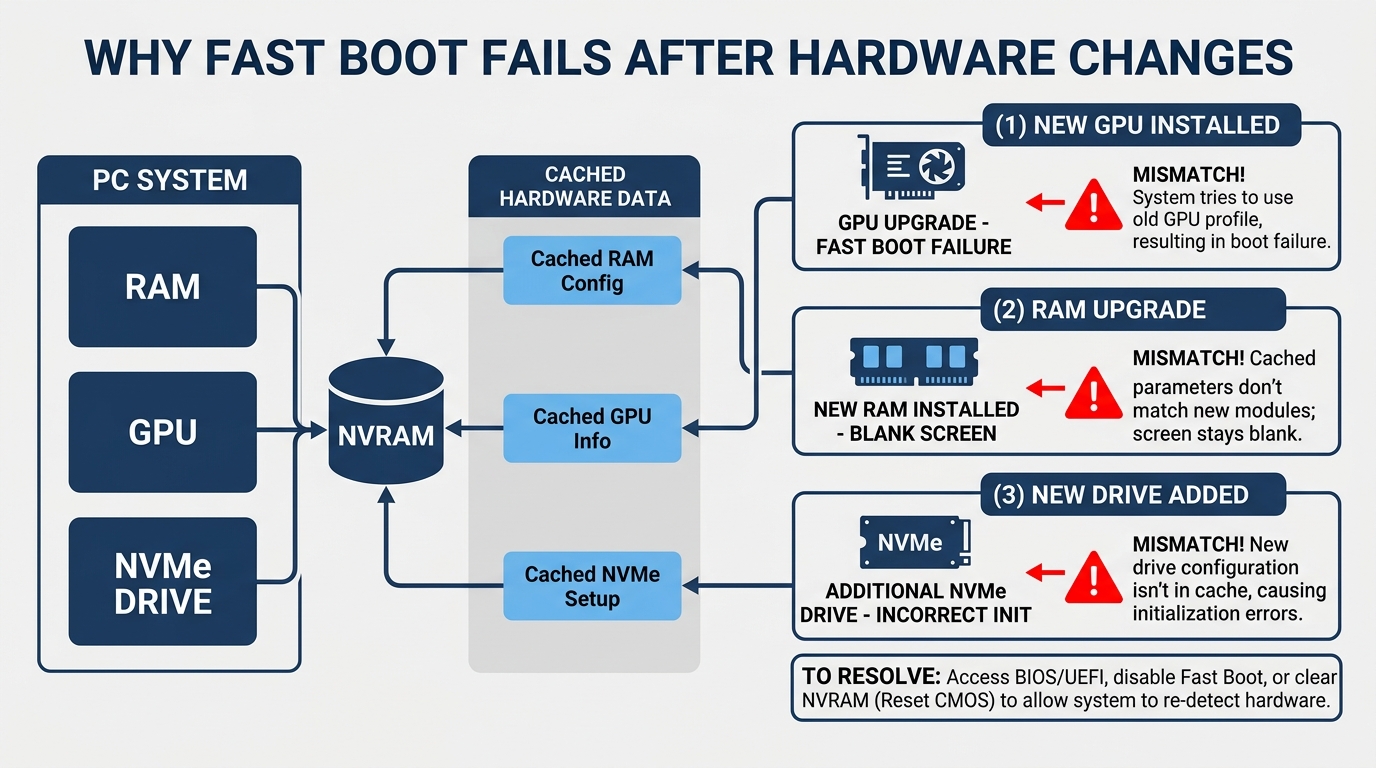
Fast Boot works by writing the results of hardware initialization to NVRAM (the same non-volatile memory that stores your BIOS settings). On subsequent boots, the firmware reads those cached results instead of re-running the test sequence.
This is why Fast Boot breaks after a hardware change. Install a new GPU, swap a RAM kit, or add an NVMe drive and the cached data no longer matches what’s physically in the system. The BIOS either throws an error, boots to a blank screen, or silently initializes the new device incorrectly.
According to a contributor on the Tom’s Hardware Fast Boot discussion thread, the mechanism works by keeping select components partially powered after shutdown so the firmware doesn’t have to re-initialize them from a cold state, meaning Windows skips a chunk of the reload cycle on the next startup. That’s efficient when the hardware hasn’t changed. It’s a liability when it has.
Fast Boot in BIOS vs. Windows Fast Startup: Are They the Same Thing?
No. They get conflated constantly in forum threads, and mixing them up leads to bad troubleshooting decisions. These are two entirely separate features that operate at different layers of the stack.
| Feature | Fast Boot (BIOS) | Fast Startup (Windows) |
|---|---|---|
| Where it lives | UEFI/BIOS firmware | Windows Power Settings |
| What it does | Skips hardware POST checks | Saves kernel session to hiberfil.sys on shutdown |
| Affects | Hardware initialization sequence | OS kernel load time |
| Can cause | USB failures, RAM OC instability | Driver state persistence issues, Windows Update problems |
| How to disable | BIOS Boot menu | Control Panel > Power Options > Choose what the power buttons do |
| Works without Windows | Yes | No |
You can have BIOS Fast Boot enabled with Windows Fast Startup disabled, or vice versa, or both on, or both off. They stack independently. If you’re troubleshooting boot problems on Windows 11, check both settings separately. Disabling one while leaving the other enabled is a common reason “I already disabled Fast Boot” doesn’t fix the issue.
Should You Enable Fast Boot in BIOS?
Whether Fast Boot should be on or off in your BIOS depends entirely on what you’re doing with your PC.
When to Keep Fast Boot Enabled
Fast Boot is fine left on if your system is stable and you haven’t touched the hardware in a while. Specifically, it’s a safe default for:
- Office and productivity machines: stable hardware, no USB boot needs, and every second of startup time has real-world cost
- Pre-built systems (HP, Dell, Lenovo): the OEM has already tuned Fast Boot to that specific hardware config, so the cached data is reliable
- Stock-speed gaming rigs: if you’re not overclocking RAM or swapping components, the risk is near zero
- Systems that haven’t had hardware changes in months: the cached initialization data is accurate and there’s nothing to surprise the BIOS
When to Disable Fast Boot in BIOS
This is where most people should pay attention. Fast Boot causes real problems in specific situations, and the symptoms aren’t always obvious.
- Overclockers and XMP/EXPO users: Fast Boot skips full memory training. When you’re running RAM at 4000MHz or above, that training run is what catches instability. With Fast Boot on, a system can appear stable while silently papering over errors that would surface in MemTest86.
- USB boot drive users: if your BIOS doesn’t enumerate USB devices at POST, your bootable drive won’t show up in the boot menu. Dead end. Turn Fast Boot off before attempting to boot from USB.
- Troubleshooting hardware issues: skipping POST means you won’t catch failing RAM or a dying drive during early initialization. You need the full test sequence running.
- After adding new hardware: fresh GPU, NVMe SSD, or new RAM kit, the BIOS cache is stale. Disable Fast Boot until the new hardware has been initialized cleanly at least once.
- Multi-OS and dual boot setups: the boot menu interrupt window (F8, F11, F12) can become too narrow to reliably trigger. You’ll miss it every time.
- IT admins and imaging workflows: PXE boot and network boot timing depend on a predictable POST window. Fast Boot makes that timing unreliable.
| User Type | Fast Boot Setting | Reason |
|---|---|---|
| General / office user | ON | Stable hardware, real speed benefit |
| PC gamer (stock speeds) | ON | Minimal risk, faster startup |
| Overclocker (XMP/EXPO enabled) | OFF | RAM training must complete fully every boot |
| USB bootable drive user | OFF | USB enumeration required at POST |
| Troubleshooting a PC | OFF | Need full POST data and error detection |
| After hardware upgrade | OFF (temporarily) | Clear stale cached initialization data |
| IT admin / imaging | OFF | Boot menu and PXE timing must be reliable |
Does Fast Boot Affect Gaming Performance?
Short answer: no. Fast Boot has zero effect on in-game FPS, frame pacing, or application performance once Windows is loaded. The feature only operates during the pre-OS initialization window. After that, it’s completely out of the picture.
The Tom’s Hardware forum thread linked above includes a user who reported worse gaming performance after disabling Fast Boot, including screen tearing and a perceived drop in responsiveness. The moderator’s diagnosis was correct: the issue was driver state, not Fast Boot itself. The recommendation was to run DDU (Display Driver Uninstaller) in Safe Mode to fully wipe all GPU drivers (Intel, AMD, and Nvidia), then reinstall the latest driver from Nvidia’s support site using right-click > Run as Administrator.
This is a known edge case. When you toggle Fast Boot, the GPU’s initialization sequence changes. If a driver was installed under one boot mode and you switch to the other, the cached driver state can be inconsistent. A clean DDU wipe resets that. Not a Fast Boot problem. A driver problem.
There’s also a rarer scenario where Fast Boot carries a misconfigured GPU state across reboots, making a restart functionally useless for clearing a software GPU issue. In that case, a full power-down (holding the power button until the system completely shuts off) clears the state even with Fast Boot enabled.
How to Disable Fast Boot in BIOS: Brand-by-Brand Guide
The Fast Boot setting is in a slightly different location depending on your motherboard or system brand. Here’s exactly where to find it.
How to Disable Fast Boot on ASUS Motherboards
ASUS boards ship with Fast Boot accessible in the Advanced Mode of the UEFI. If you’re looking at EZ Mode when you first enter BIOS, press F7 to switch.
- Enter BIOS: press Delete or F2 immediately after powering on
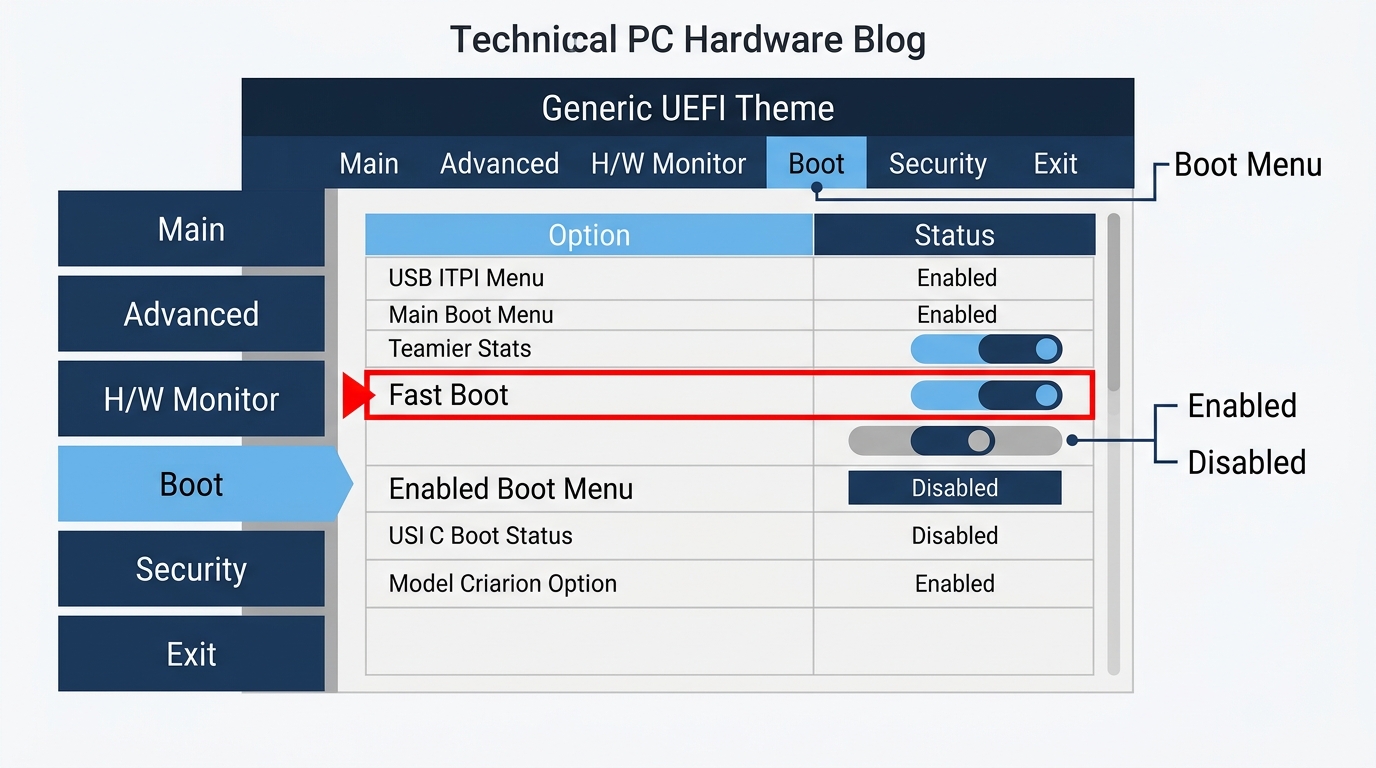
- Navigate to: Boot tab > Boot Configuration > Fast Boot
- Set to: Disabled
- Save and exit: press F10, confirm
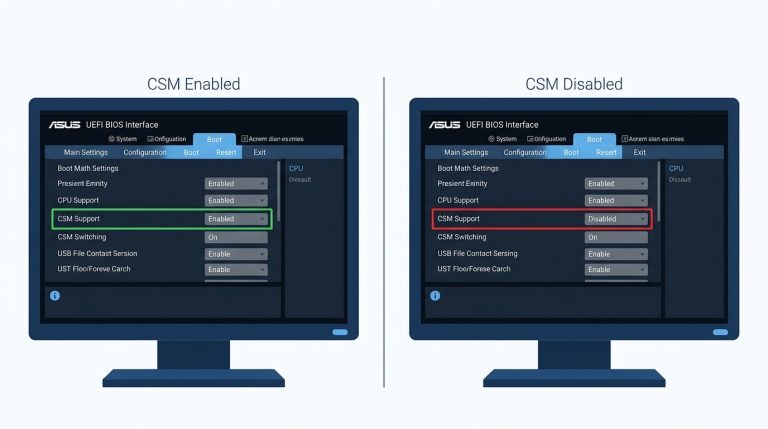
On ASUS ROG and TUF boards, you may also see a “Next Boot After AC Power Loss” or “POST Delay Time” option nearby. These are separate from Fast Boot. The Tom’s Hardware moderator recommendation for ASUS B660M-class boards is Fast Boot ON, Secure Boot ON, CSM disabled, and XMP on for a stable daily-driver configuration. Adjust from that baseline rather than toggling everything at once.
How to Disable Fast Boot on HP Systems
HP consumer desktops and laptops use F10 to enter BIOS setup, though some models require pressing Escape first to get to the startup menu, then F10.
- Enter BIOS: power on and immediately press F10 (some models: Esc, then F10)
- Navigate to: Advanced > Boot Options > Fast Boot checkbox
- Uncheck the box to disable
- Save and exit: F10
HP business systems (EliteBook, ProDesk, EliteDesk) use HP’s own BIOS interface and may label this setting differently. Look under the “Boot Order” or “Startup” tab if you don’t see it under Advanced. The path can also vary by BIOS revision, so check the system’s support page at support.hp.com if the menu layout doesn’t match.
How to Disable Fast Boot on Dell Systems
- Enter BIOS: power on and press F2 repeatedly until the setup screen loads
- Navigate to: Boot Configuration > uncheck “Enable Fast Boot,” or find the toggle in the Boot Sequence tab
- Apply Changes and exit
Dell Inspiron, XPS, and OptiPlex lines all use variations of this layout. On newer Dell systems running the updated UEFI interface, the setting may appear as a toggle switch rather than a checkbox. Same function, different visual.
How to Disable Fast Boot on Lenovo Systems
- Enter BIOS: power on and press F1 (ThinkPad) or F2 (IdeaPad, Legion). Some models require pressing the small Novo button (pinhole) before powering on to reach the boot menu first.
- Navigate to: Startup tab > Fast Boot
- Set to: Disabled
- Save and exit: F10
Legion gaming laptops and desktops share the same general path but may use a more modern BIOS skin. The Startup or Boot tab is always the right place to look on any Lenovo system.
How to Enable Fast Boot in BIOS (General Steps)
Enabling Fast Boot is the exact reverse. Find the same setting in your Boot menu, set it to Enabled or check the checkbox, then save with F10. The setting takes effect on the very next boot, so you’ll notice the faster startup immediately. No additional steps needed after saving.
Fast Boot and RAM Overclocking: Why You Should Be Careful
This is the scenario where Fast Boot causes the most silent damage, and almost no mainstream guide covers it clearly.
When you enable XMP or EXPO to push your RAM above stock speeds, the BIOS runs an extended memory training sequence to find stable timings at that frequency. This isn’t a one-time event. Every cold boot should run it, because temperature, component aging, and voltage fluctuations all affect RAM stability over time.
With Fast Boot on, the BIOS skips that training and loads cached results from the last successful boot. On a stock DDR4-3200 kit, this is fine. At DDR4-4000 or DDR5-6000 with tightened secondaries, it can mask instability that would show up immediately if the training ran cleanly.
Practical scenario: your system posts fine with Fast Boot on. You run it for weeks, no crashes. You then disable Fast Boot and run MemTest86 for a proper stability check and you get errors in Test 7. The RAM was never actually stable. Fast Boot was just skipping the tests that would have caught it.
If you’re dialing in a new XMP or EXPO profile, always disable Fast Boot and run at least a few complete POST cycles before calling it stable. If you want to understand exactly how DOCP and EXPO work before you start, the DOCP and EXPO explainer covers the full process for AMD platforms.
Always validate with Fast Boot off. Then re-enable it once you’ve confirmed stability.
Frequently Asked Questions About Fast Boot in BIOS
What is Fast Boot in BIOS?
Fast Boot is a BIOS/UEFI setting that shortens startup time by skipping parts of the hardware initialization process, specifically the Power-On Self-Test (POST). Instead of re-running full hardware checks on every boot, the firmware reads cached initialization data from NVRAM and jumps directly to loading the operating system. The time savings is typically 10 to 25 seconds depending on the hardware.
Should Fast Boot be enabled or disabled in BIOS?
For most general users with stable, unchanged hardware, Fast Boot can safely stay enabled. Disable it if you’re overclocking RAM (running XMP or EXPO), trying to boot from a USB drive, troubleshooting a hardware problem, or immediately after installing new components. The setting is completely reversible, so toggling it carries no risk to your system.
Does Fast Boot in BIOS affect performance?
Fast Boot only affects the time it takes to reach Windows. It has no impact on in-game FPS, frame pacing, application load times, or any other aspect of performance once the OS is running. If you notice a performance difference after toggling Fast Boot, the real cause is almost always GPU driver state. A clean DDU reinstall fixes it.
Is Fast Boot in BIOS the same as Windows Fast Startup?
No. Fast Boot is a firmware-level setting that controls hardware initialization during POST. Windows Fast Startup is an OS-level feature that saves the kernel session to disk on shutdown so Windows loads faster on the next boot. They are completely separate and operate independently. You can enable or disable either one without affecting the other.
Where is Fast Boot in BIOS?
Fast Boot is typically located under the Boot tab in your UEFI/BIOS setup. On ASUS boards it’s under Boot > Boot Configuration in Advanced Mode. On HP systems it’s under Advanced > Boot Options. On Dell systems it’s under Boot Configuration. On Lenovo systems it’s under the Startup tab. The exact path varies slightly by model and BIOS revision, but the Boot section is always the right place to start looking.
Wrapping Up
For a stable, stock-speed system that you haven’t touched in months, leaving this setting enabled is completely reasonable. You get a faster startup with essentially zero downside. But if you’re overclocking RAM, swapping hardware, booting from USB, or troubleshooting anything at all, turn it off before you start. It’s a one-setting change in your Boot menu, it takes 30 seconds, and it eliminates an entire category of phantom problems that otherwise take hours to diagnose. Toggle it based on what you’re doing with the machine, not based on what the default happens to be.

Alex has been building and tweaking custom PCs for over 12 years. From budget builds to full custom water loops, he’s assembled more than 50 systems and helped hundreds of builders troubleshoot their rigs. When he’s not benchmarking the latest hardware, you’ll find him optimizing airflow setups or stress-testing overclocks.